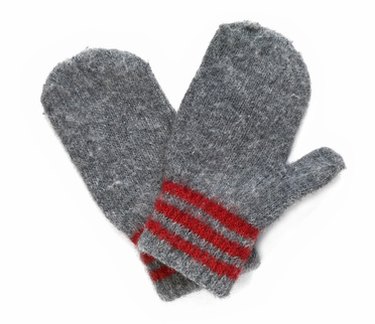
Knitting small, tubular articles such as socks or mittens on circular needles is called the â??magic loopâ? method of knitting in the round. This technique is relatively new and eliminates the old tricky method of knitting on double-pointed needles. This clever method also guarantees the needed length of needle is always available. The following directions are for ladiesâ?? size medium mittens.
Getting Started
Video of the Day
Step 1
Choose a yarn. Worsted-weight wool is best and warmest.
Video of the Day
Step 2
Measure the circumference of your hand around the knuckles. For this example, this number would be 7.5 inches.
Step 3
Determine the gauge of your yarn. Gauges are generally printed on yarn wrappers. However, to determine the gauge of your yarn, knit a swatch or square 4 inches by 4 inches, then count the number of stitches (across) and rows (down) in that area. This is your gauge. Divide the number of stitches by four for the number of stitches per inch.
Step 4
Determine the size needle needed to achieve that gauge. For this example, the gauge is four stitches per inch.
Step 5
Multiply the number of stitches per inch gauge by 7.5, or the hand circumference. This is the number of stitches to cast on. In this case, cast on 30 stitches.
Knitting the Cuff
Step 1
Divide the stitches evenly between the two halves of the needle.
Step 2
Place a marker, join the work and knit in the round.
Step 3
Knit in knit one, purl one ribbing for 2 to 3 inches.
Step 4
Change to stockinette stitch for the hand portion.
Step 5
Increase one stitch at the end of the last round. This will equal 31 stitches.
Thumb Gusset
Step 1
Knit 15 stitches, place a marker, increase one stitch, knit one, increase one stitch, place a marker, knit to end of roundâ??two stitches increased; there are now three stitches between gusset markers. Knit the next round. Increase two stitches inside the gusset markers every three rounds four times until there are 11 gusset stitches.
Step 2
Place gusset stitches on a piece of waste yarn. Remove the stitch markers.
Step 3
Cast on one stitch over the gap left by the gusset, then knit to the end of the round. This equals 31 stitches.
Step 4
Work evenly until the knitting measures to the top of the little finger.
Step 5
Decrease three stitches evenly around work on the next round. Now there should be 28 stitches remaining.
Shaping the Top of the Mitten
Step 1
Knit five, knit two stitches together. Repeat to end of round.
Step 2
Knit the next round.
Step 3
Decrease four stitches every other round until 16 stitches remain.
Step 4
Decrease four stitches in this manner until only four or eight stitches remain.
Step 5
Cut yarn. Thread through the remaining stitches and pull up tight to close the end of the hand.
Thumb
Step 1
Place the 11 held gusset stitches onto another circular needle of the same size. Pick up and knit one stitch over the gap. This equals 12 stitches. Join and work in the round until the thumb measures to the middle of the thumbnail.
Step 2
Knit two stitches together, knit three two times on the next round. Then knit two stitches together, knit two. Knit the following round.
Step 3
Decrease three stitches on the next round. Six stitches should remain.
Step 4
Cut yarn, thread end through stitches, pull tight and fasten off.
Step 5
Weave in all loose ends, closing any gaps at the base of the thumb. Block and wear.
Tip
This technique has a vast following but is difficult to describe. It is best learned by viewing examples. YouTube.com offers a variety of videos that are very helpful.