Before you can diagnose a problem with your Whirlpool dryer, much less begin to repair it, you'll most likely need to remove the front panel of the machine. Removing the panel will give you access to components that commonly need to be repaired or replaced. The precise instructions for removal of the front panel will, of course, depend on the type of dryer you have: One with a standard metal panel or the newer styles that include glass.
Video of the Day
Before You Begin to Remove the Panel
No matter what type of dryer you have or the style of its front panel or door, it's important to take appropriate steps to remain safe while you remove the door.
Video of the Day
First and foremost, unplug your dryer from its electrical outlet. It's not necessary to shut off the breaker to that outlet. However, you will want to make sure the machine has been completely disconnected from its power supply.
If your dryer is a gas model, you'll also need to take the additional step of disconnecting your dryer from its gas line. After unplugging your dryer from the outlet, make sure all flames and pilot lights in your house have been extinguished. This is to prevent accidental ignition through escaping gas from your dryer.
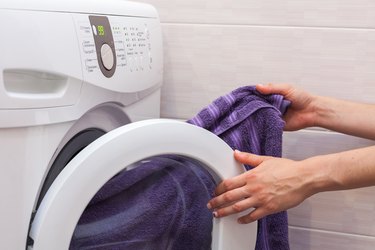
Next, remove all the lint from your dryer's lint filter or screen, as well as any lint or material that might have fallen on the floor around your dryer. These can serve as ignition fuel. Turn off the gas supply to the dryer (there should be a small valve on the dryer's line), or you can turn off the main valve for the gas supply to the house.
After unscrewing the dryer's flex hose from the line, cap the line with a gas line cap, which is available from most major home improvement stores. You can tighten the seal with some Teflon tape.
You may want to open doors and windows to allow the room to air out for a few minutes before proceeding. Of course, if you smell gas after this point, you'll want to shut off the main gas valve and call your fire department and gas supplier.
Removing the Front Panel
If your Whirlpool dryer is an older model with a front panel, start by accessing the control panel. With a screwdriver, loosen and remove the screws that connect the control panel to the top of the dryer. Move the control back to the service position.
Next, remove the three screws on the top panel near the control panel. To disconnect the wiring harness, depress the locking tab. Lift the top panel up and slide it off of the dryer. With a putty knife, release the retaining clips that connect the toe panel to the dryer and pull the panel off.
You should see two door springs that are connected to the base of the dryer. Disconnect these by pulling down on them. Open the door and use a screwdriver to loosen and remove the screws that connect the lint duct. Remove the lint duct and close the dryer door.
Loosen and remove the four screws securing the front panel corners to the machine's body. Disconnect the wiring harness inside the clip just under the right side panel. You should be able to then remove the front panel by simply pulling it away from the machine's body.
Removing the Panel From Newer Dryers With Glass or Glass Inserts
You'll have to access the back of the dryer to remove a panel from these newer Whirlpool dryer models. Look for three screws at the rear of the top cover. Remove these with a screwdriver, then simply lift the cover up and slide it off. Depress the locking tabs connecting the wiring harness to the electronic console, then pull the harness apart.
On the front of the dryer, press out on the two end tabs connecting the console to the dryer's front. Pull up on the console to unhook it from the front, then you should be able to easily slide it away from the dryer.
Open the dryer door and use a small putty knife to pry the door switch off of the dryer. With needle-nose pliers, remove the three wires from the door switch terminals. Be sure to grab and pull the wires by the leads, not the wire itself, to avoid damaging the machine's electrical wiring.
Remove the lint filter from the bottom of the dryer door, then use a screwdriver to remove the two screws on either side.
After closing the dryer door, loosen and remove the two screws on the bottom of the toe panel. Pull the toe panel away from the dryer.
Loosen and remove the two pairs of screws, one at the top of the front panel and one at the bottom. Carefully remove the front panel away from the dryer.