Originated by Native American cultures, the dreamcatcher was traditionally made from a bent piece of willow formed into a ring to symbolize the earth and moon. Several legends surround how the dreamcatcher was created, but most agree the woven web would catch good dreams. The good dreams would then slide down the strings and feathers into the minds of the sleeping children below. The bad dreams, which also flowed freely throughout the night, would pass through the holes of the web. Whether you are trying to ward off bad dreams, teaching about Native American culture or just looking for a fun craft, making dreamcatchers is a beautiful and rewarding project for almost any age.
Things You'll Need
Video of the Day
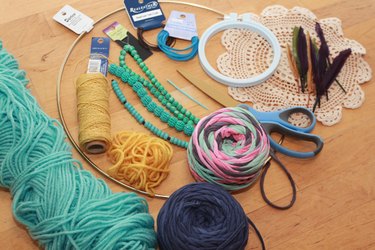
Traditionally, the materials included willow, leather and animal sinew but nowadays range from modern store-bought brass rings to makeshift embroidery hoops to upcycled holiday wreaths and a variety of fibers.
Video of the Day
- Hoop of choice
- Scissors
- Variety of yarns, leather strips, cordage, embroidery floss or other string
- Beads, feathers or other decorative items
Make a Loop
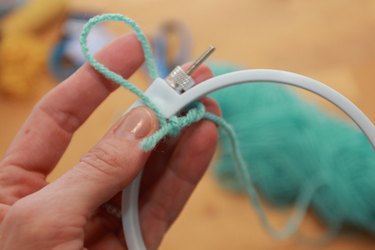
Begin by making a 2-inch loop with your yarn, and tie it to what will be the top of your hoop. You will eventually be hanging your dreamcatcher, so the loop will act as your hook.
Wrap the Hoop
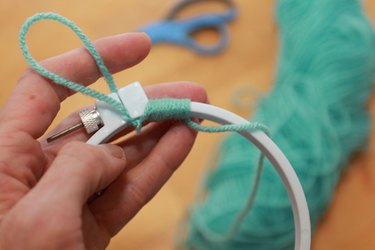
Wrap your yarn (or leather strips or ribbon) in a tight, uniform layer around the entire circumference of the hoop. Don't worry if your yarn feels loose as you wrap. You can wrap several inches at a time and then tighten it up before wrapping another few inches. Unless you are using a willow ring that you've bent into shape, wrapping your craft store ring will not only look better, but it will also make the subsequent weaving steps much easier, as the yarn will slip less on a wrapped hoop.
Wrap Completely
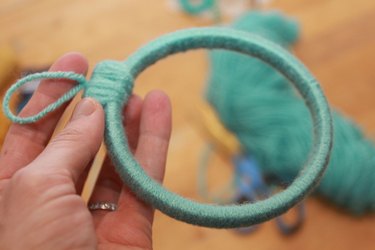
When the ring is wrapped completely, knot the yarn tightly under the hanging loop you first created and then snip off any excess yarn tail, leaving your hanging loop intact. If using an embroidery hoop, you may want to wrap the top portion of the ring to hide the closures.
Start the Web
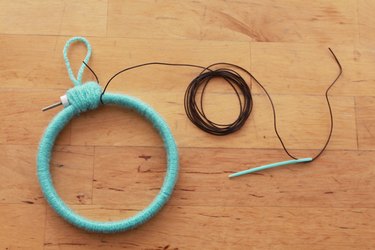
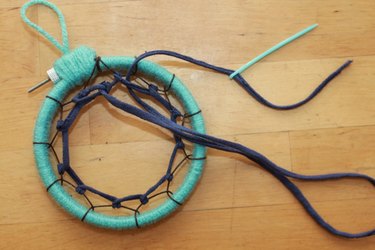
Grab a different weaving material than you used to wrap your hoop, such as leather cord, which is what was used in this project. With the leather cord, tie a knot at the top of your wrapped hoop.
Build the Web
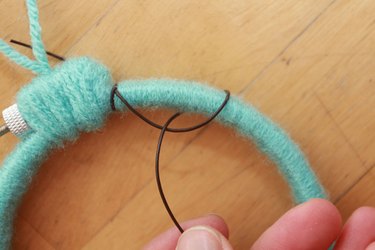
Begin by draping your leather cord (loosely) across the front of the wrapped hoop. Wrap the leather cord over the hoop, and then pull it underneath and back toward the front of the hoop, crossing over itself.
Continue Building the Web

Continue wrapping the leather cordage around the hoop. Space the leather loops evenly as you work, about an inch apart, so that your last leather loop ends roughly where you began. Tie a knot after the last loop and trim excess cordage.
Add a Third Color to the Web

Grab your next string color. This will be the main color used for your web. This project used yarn made from jersey cotton for the third string color. Tie a knot with your new yarn in the center of a leather loop.
Start the Center Web
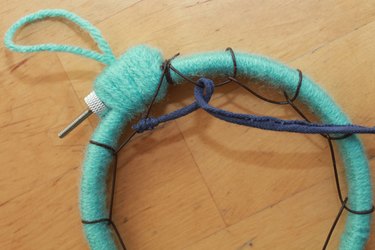
Loop the yarn through the center of the next leather loop, pulling it over top and then underneath.
Weave the Center Web
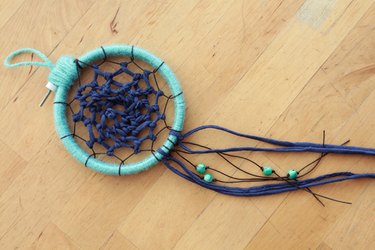
Continue looping the yarn through the leather loops in this over-under weaving pattern around the entire hoop. Then repeat the weaving pattern by looping through the yarn loops, going around the entire hoop again. Continue weaving until you've reached the center of the web.
Close the Center Web
Traditional dreamcatchers leave a small hole in the center to filter the bad dreams out, but the size of your center hole is completely up to you. Tie the yarn in a knot in the center of the web and cut off the excess when you are ready to stop weaving.
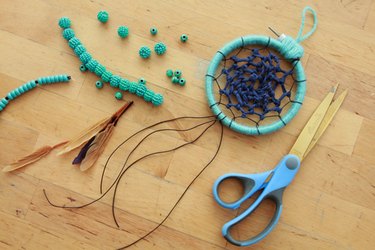
Add a Decorative Tail
Often, sacred items like feathers were used as the tails of traditional dreamcatchers. While making the tail of your dreamcatcher, use items that you hold dear to help influence sweet dreams. You can string beads onto leather strips of any length and knot them into place. Tie as many colors and textures of yarn, beads and feathers onto your dreamcatcher as you like. The tail length can vary depending on the diameter of the ring you use, but generally they are twice as long as the height of the ring. Add any personal touches that will make your dreamcatcher tail a gateway to a peaceful night's rest.
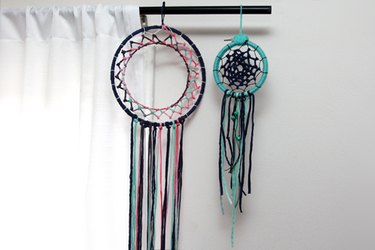
Variation: Off-Center, Wide-Open Dreamcatcher
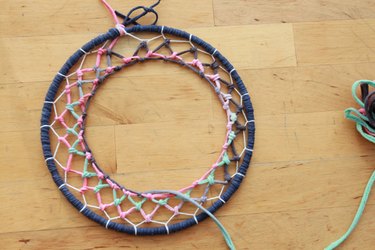
Although there is not an exact science to making a dreamcatcher, you'll see some have bigger holes left in the center to allow bad dreams to easily pass through. Play with the size of the inner hole as well as the positioning. The example shown was strung with more tension on one side to place the center circle off center and then left with a wide opening at the center. You can also experiment with the various weights and colors of yarn and string to give you a customized look every time you make a dreamcatcher.