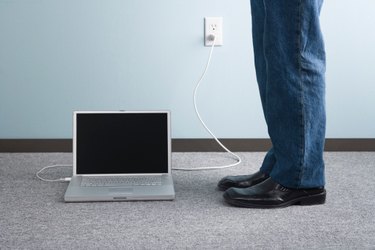
When you press the power button on your laptop and the laptop does not turn on, it can be very disquieting. Short circuits are caused by a variety of issues, including the spilling of liquids, a brown out or an unexpected electric shortage in the home or office, or a simple cable failure. This doesn't mean you should just throw out the laptop, as it may still be salvageable. You need to troubleshoot the power problem, to make sure that the laptop is actually shorted out and that it is irreparable or that its dead appearance is not caused by something else.
Step 1
Test the power supply by plugging it into the wall or a strip outlet to see if the LED on the power supply lights up. Make sure that the power adapter is not plugged into the laptop, only the wall or the strip outlet. All current laptop adapters have this LED light, which allows users to identify issues related to power supply cables. If the led light does not turn on, test it in another outlet. If you still see no light the surge protector in the cable is burnt and the cable needs replacing.
Video of the Day
Step 2
Check output voltages. Place the positive pin on the inside of the cable power connector that inserts into the laptop. Place the negative pin on the outside of the cable connector. Look on the digital display to see the reading. Verify that the output is correct by reading the recommended output levels on the label underneath the laptop. Replace the power cable if the voltage output has a large variance.
Step 3
Use the multimeter or an ohmmeter to test for short circuits on the actual laptop. Place the positive pin on the inside of the power connector on the laptop. Place the negative pin on the outer metal part of the connector. Read the multimeter digital display for the ohms. If the reading is less than 3 ohms, it is an indication of a short circuit. Remove devices like CD/DVD ROM, battery, Floppy or any other connected device to see if it is the cause of the short circuit. Turn on the computer without these devices to see if it starts.
Video of the Day
Liquid Damage
Step 1
Remove the power cable and any other cables or external devices from the laptop.
Step 2
Open the laptop and insert a precision flatblade screwdriver in the corner of the plastic plate covering the power button that sits above the keyboard. Lift this plate carefully from the computer.
Step 3
Unfasten the screws holding the keyboard and disconnect the data cable from the motherboard.
Step 4
Look for liquid residue on the motherboard. . If the liquid was something other than water, the dried liquid residue may cause a short circuit. Removing this dry residue can make the computer work again.
Step 5
Clean the residue by dabbing at it with a soft cloth dipped in 99 percent isopropryl alcohol. Replace the keyboard and connect the laptop to the power outlet. Turn it on to see if it works.