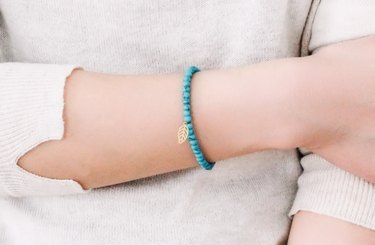
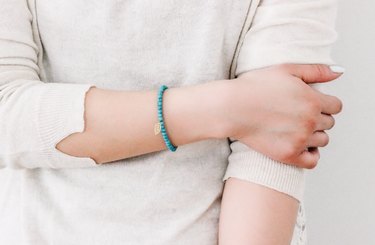
While learning to make jewelry, working with simple pieces provides excellent practice for acquiring new skills. For example, this beaded bracelet tutorial demonstrates how to use staples such as jump rings and jewelry clasps. It also displays the three different ways you use jewelry pliers: cutting, bending and flattening. After you complete this bracelet, you can adapt the techniques to make other types of jewelry.
Things You'll Need
Video of the Day
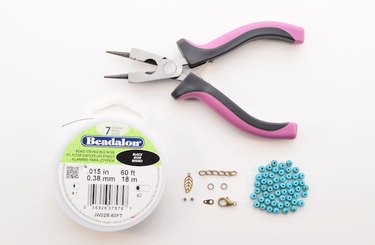
- 3-in-1 jewelry pliers
- Beading wire
- Charm
- Crimp beads (2)
- Short length of extender chain (optional)
- 4mm jump rings (2)
- Jewelry clasp and tag
- Beads
Video of the Day
You can use beads in any shape or size for this project.
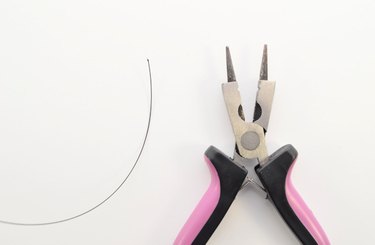
With the cutting portion of the pliers (or scissors), cut a strand of beading wire measuring 1 1/2 times the circumference of your wrist.
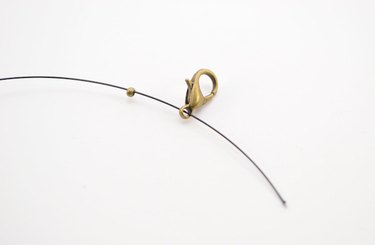
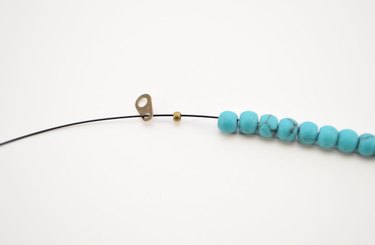
Add a crimp bead (a tiny metal bead that, when flattened, keeps wire in place), followed by a jewelry clasp. Position both components about 1 inch from one end of the wire.
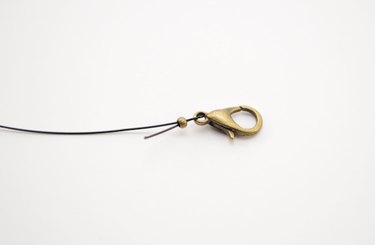
Take the same end of the wire and feed it back through the crimp bead you just added. Slide the crimp bead close to the jewelry clasp.

Place the wire in between the pliers, positioning the crimp bead in the flat portion. Squeeze the handles together to flatten the crimp bead. Apply enough pressure to completely flatten the crimp bead.
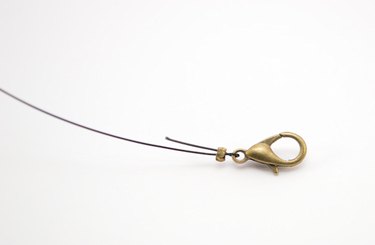
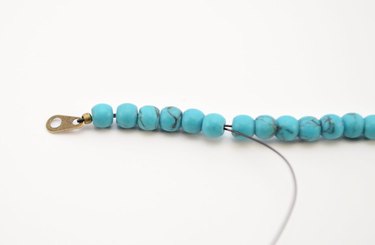
Tug on the wire to check that the crimp bead does not move. This is important because the crimp bead keeps the clasp on the bracelet.The tip of the wire now lies parallel to the rest of the wire, near the clasp.

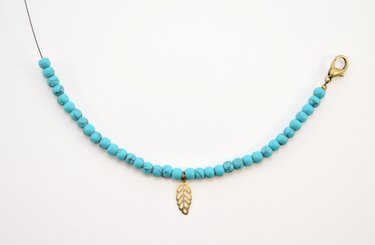
Add beads to the wire, inserting the tip of the wire into the first few beads. The hole of most beads can accommodate two strands of wire at the same time. Use beads in one color to create a solid-colored bracelet or multiple colors to make a patterned version.
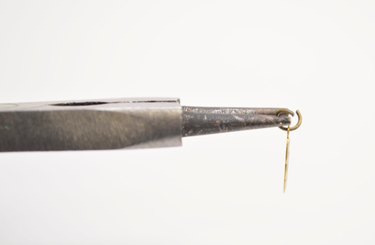
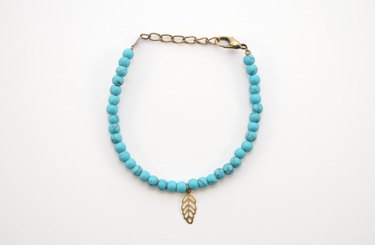
Prepare the metal charm by adding it to a jump ring. Using the round-nosed end of the pliers, add the charm to a jump ring. To do this, open a jump ring by bending the ends in opposite directions. After you add the charm, close the jump ring by bending the ends back together.
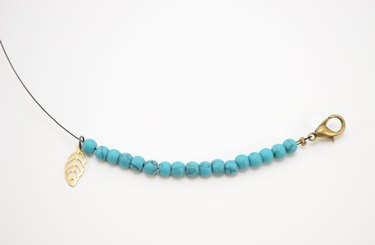
Add the charm once you have beaded half the wire. Adding the charm at this point keeps it centered.
Add the remaining beads. Use the same number of beads on each side of the charm. Size and shape of the finished bracelet determines the total number of beads you need.
Add another crimp bead, then add the tag. The jewelry clasp attaches to the tag when you wear the bracelet.
Insert the loose end of the wire back through the crimp bead you just added. Continue feeding it through the 4 to 6 beads you added last. Pull the wire tight, making sure there are no gaps between the beads.
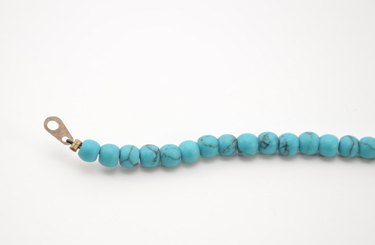
Using the jewelry pliers, flatten the crimp bead and trim the excess wire.
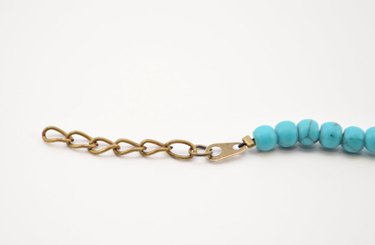
To increase the length of a bracelet, use a jump ring to attach an extender chain to the metal tag. Extender chains are made of wide chain links and are specifically designed for adding length to bracelets or necklaces. This is a useful addition if you are making a bracelet for someone but are unsure of his or her wrist size.
Expert Tips for Making Beaded Bracelets
For extra security, apply a drop of clear nail polish to each flattened crimp bead. This is an easy, inexpensive way to keep the bracelet from falling apart with the natural wear and tear on jewelry.
More Ideas for Beaded Bracelets
After you master a basic beaded bracelet, mix it up by using more than one type of bead. For a customized pattern, alternate bead types, colors or sizes. You can also add multiple charms at equal intervals for a beaded charm bracelet.