
What Is a Spectrometer?
A spectrometer is a measuring device that collects light waves. It uses these light waves to determine the material that emitted the energy, or to create a frequency spectrum. Astronomers make the most frequent use of spectrometers to determine the makeup of stars or other celestial bodies. When objects are hot enough, they emit visible light at a given point or points on the electromagnetic spectrum. Spectrometers split the incoming light wave into its component colors. Using this, they can determine what material created the light.
Layout of a Spectrometer
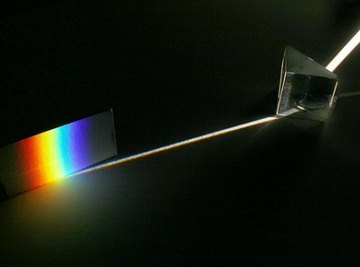
The most basic design of a modern spectrometer is an assembly of a slitted screen, a diffraction grating and a photodetector. The screen allows a beam of light into the interior of the spectrometer, where the light passes through the diffraction grating. The grating splits the light into a beam of its component colors, similar to a prism. According to the University of Arizona (reference 1), many spectrometers also have a collimating mirror that makes the light waves parallel and coherent, thus making it more focused. This applies especially to spectrometers used in telescopes. The light then reflects onto a detector that picks up individual wavelengths.
Uses for Spectrometers
According to NASA (reference 2), spectroscopes can determine atmospheric composition by analyzing the wavelengths of absorbed sunlight that passes through a given section of the atmosphere. When light passes through a gas, like oxygen or methane, the gas absorbs some of the wavelengths. This is viewed as different colors, depending on the gas.
References
About the Author
Michael Smathers studies history at the University of West Georgia. He has written freelance online for three years, and has been a Demand Studios writer since April 2009. Michael has written content on health, fitness, the physical sciences and martial arts. He has also written product reviews and help articles for video games on BrightHub, and martial arts-related articles on Associated Content.
Photo Credits
www.e-education.psu.edu