High-resolution photos are great for printing, but sending then to friends and family via email can be a drag on bandwidth. Windows gives you an opportunity to reduce a photo's size when you attach it to an email message. If you have a Mac computer, you can resize images using Preview before sending them out.
Using Windows
Video of the Day
Step 1
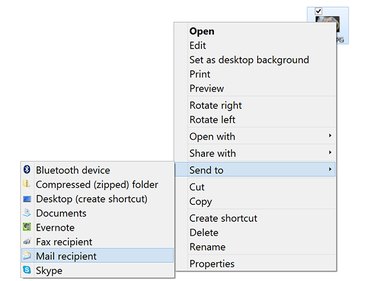
Right-click the photo you want to send, either in File Explorer or on the desktop. Select Send To from the drop-down menu and then click Mail Recipient. Alternatively, click the Share tab in the File Explorer window and click Email.
Video of the Day
This feature connects directly to your email client, such as Outlook. If you want to resize the image to send with a different email client, or a Web-based client like Gmail, resize the image using an app like Windows Photo Gallery.
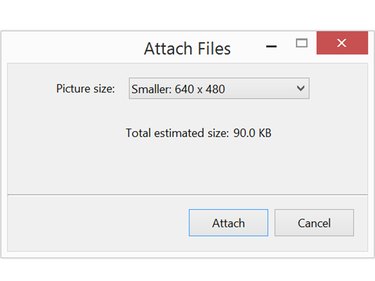
Step 2
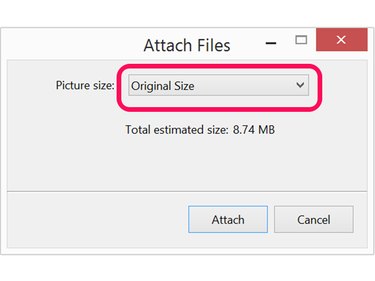
Click the Picture Size menu. Note that the picture's estimated file size is displayed here.
Step 3
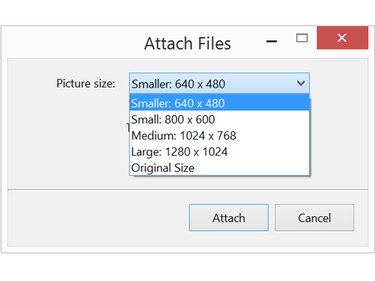
Select Small or Smaller to reduce the image size. If it's a particularly large image that you don't want to shrink down too small, you can also choose Medium. After you make your selection, the new file size is displayed. Click the Attach button to open a new Outlook window with the file already attached to a new message.
This process creates a smaller copy of the picture and won't write over the original file on your computer.
Step 4
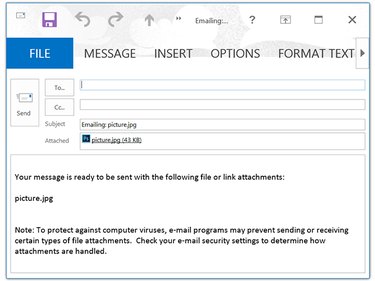
Type the recipient's name, a subject name and a message just as you would for any other email. When you click Send the message and the photo attachment are sent to the recipient.
Using a Mac
Step 1
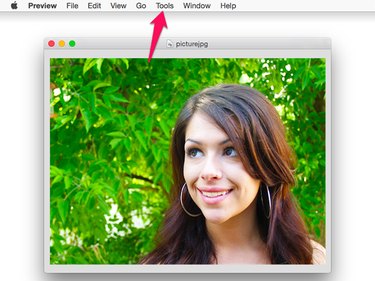
Double-click the image you want to share in Finder or on the desktop. By default, this opens the file in Preview. Click the Tools menu and select Adjust Size.
Step 2
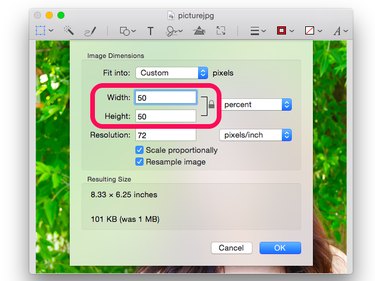
Click the Width or Height menu and change the size to something smaller. The aspect ratio is locked, so when you change one, the other is changed automatically.
By default, the unit of measurement is inches. To reduce the image by a percentage, change the unit of measurement from Inches to Percentage.
Step 3
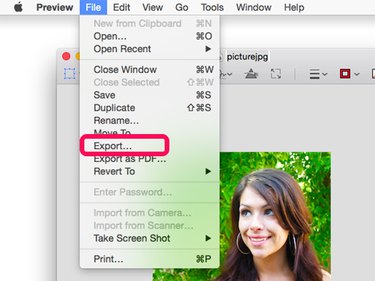
Click the File menu and select Export. Give the photo a new name so you don't write over the original photo.