Things You'll Need
Reference pictures
Bendable wire
Pliers
Wood block
Polymer clay
Yellow glass beads
Sculpting tools
Metal tray
Tin foil
Acrylic paint
Brush
Hand made figurines go for a fair amount of money on auction sites, and people often use them to create prototypes for film and game studios. These figurines are often made of polymer clay, a soft sculpting material that can be fired in a household oven. Making your own such figurines may seem daunting, but it's easily within reach. In the case of a wolf, you will need to learn how best to use a four legged armature and how to create realistic looking fur.
Step 1
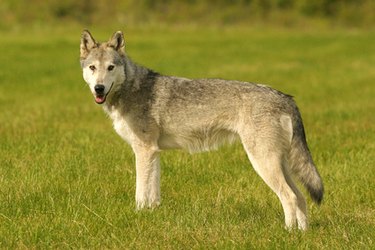
Assemble reference materials for your sculpture. Find at least one profile picture of a wolf and a profile picture of a wolf or dog skeleton. You can often find the latter in anatomy books geared toward artists.
Video of the Day
Step 2
Create a wire armature, basing it on the skeleton of a wolf. Use your reference picture as a guide for the proportions. You will need a central wire for the head, body and tail. It should loosely follow the spine of the skeleton. Use a pair of pliers to shape it accordingly.
Step 3
Add wire legs. Attach them by wrapping them around the central wire. Pose the legs and spine in the pose you wish your figure to have. The wire armature will not only guide you in your sculpting, it will also make the figurine less breakable. You may find it helpful to insert the tips of the legs into a wood block to keep them from sliding around as you sculpt.
Step 4
Break off a piece of gray polymer clay and roll it around in your hands to warm it up. Warm polymer clay is easier to shape. Form the legs of your wolf first, as they will help to stabilize the figure when you work on the body. Make the legs by rolling out four tubes of clay and squeezing them around the wire armature. Rub them up and down to smooth over any seams. Pinch and pull them to get them to resemble the legs from your reference picture. Don't worry if they look rough for now.
Step 5
Form the body with a short, thick, stocky tube for the neck, an oval for the chest and another short tube for the hindquarters. Slide them onto the armature, allowing the wire of the armature to cut through them. Smooth over the cuts with your fingers. Also smooth over the areas where the legs join with the body.
Step 6
Create a wedge for the head and join it to the neck. Make two smaller wedges and attach them to the head for ears. Select two yellow glass beads and press them into the head to form eyes.
Step 7
Go back over the body and add in details. Shave parts away using sculpting tools to give the impression of muscles. You can also press the sculpting tools into the clay to simulate fur. To do this, select a needle tool and lightly scrape it across the clay several times to create "hairs."
Step 8
Attach the clay shavings to the neck and tail and use the fur-making technique on these. The shavings will simulate the thick fur of a tail and neck ruff. Use a needle to etch in the nose, mouth and toes of your wolf.
Step 9
Remove your figurine gently from the wooden block if you used one. Place it on a metal tray. Crumple up some tin foil and wedge it under the figurine. Set the oven to 275 degrees and cook the figurine for 10 to 15 minutes. Polymer clay tends to sag in the oven and the tin foil will help prop it up.
Step 10
Remove the figure from the oven and allow it to cool for an hour. Paint the figure using acrylic paints. Paint the underside of the wolf a light gray, with highlights around the face, and paint the nose brown or black.
Warning
Do not use plastic beads in your sculpture, as they will melt in the oven.
Video of the Day