The propane regulator provides a key protective feature to the working of your gas grill. It controls the amount of propane gas going to your grill, ensuring that it delilvers gas at the same rate no matter what the pressure in the tank. The regulator also acts as a barrier between the propane tank and your grill—providing a buffer against flame contacting the propane tank.
How the Regulator Is Connected
Video of the Day
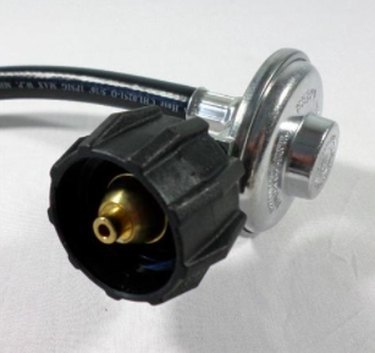
On most modern gas grills, the regulator will be threaded into the side of the control valve located on top of the propane tank. The regulator will have a distinctive round shape, from which a gas hose will run to the burner assembly on the grill.
Video of the Day
Problems can occur with the regulator itself, or with the connector hose that runs from the regulator to the grill burner assembly, or with both. As with all grill parts, the regulator can break down due to excessive usage, harsh weather, or abrasion from debris such as food, dirt, and leaves. When a grill seems to not be getting any propane fuel even though the propane tank is full, a malfunctioning regulator is likely to blame. The connector hos that link the regulator to the grill's burner assembly can also crack and leak gas, posing obvious dangers.
In older grills, the regulator and connector hose may be separate pieces, each of which can be replaced individually. But in newer grills, the regulator and connector hose are usually all one unit, with the hose permanently attached to the regulator. In this case, you will be replacing the combined regulator/hose assembly, as described below.
Step 1
Turn off the gas at the propane tank by turning the gas valve knob clockwise as far as it will go.
Step 2
Disconnect the connector hose from the grill's burner assembly by unscrewing the brass mounting nut with an adjustable wrench. If the hose connection is sticky, spray a small amount of penetrating oil on the threads of the nut and wait five minutes before trying again. Do not force the nut, as it is possible to break the fitting.
Step 3
Unscrew the regulator from the shut-off valve on top of the propane tank. Usually, this can be done by just gripping the knurled coupling knob and twisting it counterclockwise by hand.
Step 4
Buy a new regulator/hose assembly specified for your grill. On some older grills, you may now need to install a transition fitting on the burner assembly where the old hose was attached. This is because new regulator/hose assemblies use a flared fitting that may require a transition, which is sometimes included as part of the regulator/hose kit. On newer grills, this probably won't be necessary.
Step 5
Attach the regulator to the shutoff valve on the top of the propane tank. You should be able to do this by tightening the coupling knob by hand.
Step 6
To make the connector hose attachment to the burner assembly, wrap the threads of the gas nipple with Teflon tape, then thread the connector hose mounting nut onto the nipple. Tighten it with an adjustable wrench.
Step 7
Turn on the main valve at the propane tank, then test for leaks by wiping a soapy water solution over the hose gas fitting at the burner assembly. If you see bubbles, you have a propane leak and will need to slightly tighten the fitting a bit more.