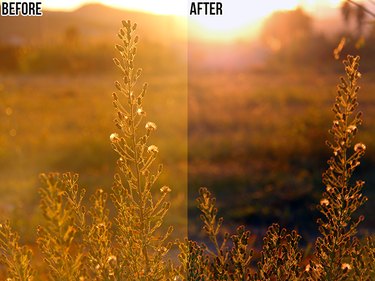
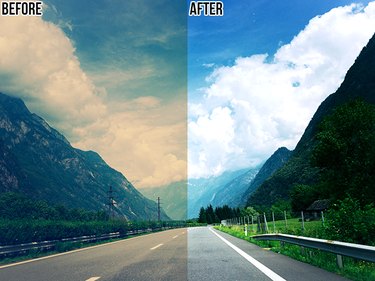
No one method of fixing unwanted yellow tints is always the best, since the results you get with each change from photo to photo -- you may even need to combine different methods to get the coloring you want. Photoshop's automatic color adjustments, eyedropper tools and filters offer different ways to arrive at the same basic outcome.
A Note on Non-Destructive Editing
Video of the Day
The adjustments described in this article are all applied non-destructively, using adjustment layers. The same adjustments can also be applied destructively, as noted in each section. Destructive editing can sometimes be faster, and could seem attractive if you just want to quickly adjust your photo and move on; however, using adjustment layers gives you a lot more flexibility and control over the finished result, since you can always go back and change the settings for each layer without having to start over from scratch. Furthermore, using adjustment layers means Photoshop won't discard any image data until you save the photo in a format that doesn't support layers, minimizing the impact of your editing on image quality.
Video of the Day
Automatic Color Adjustment
When you apply an automatic color adjustment, Photoshop analyzes the image to identify shadows, midtones and highlights and determine the best tonal values for them. By default, midtones are targeted to a completely neutral gray (RGB 128, 128, 128) and both shadows and highlights are clipped by 0.5 percent; if you want, you can change these settings.
The process as described uses a Levels layer, but can also be performed, with identical results, on a Curves layer. Whichever layer type you use, you can then further adjust its settings, using the automatic adjustment as a starting point for your personalized fine-tuning.
Step 1
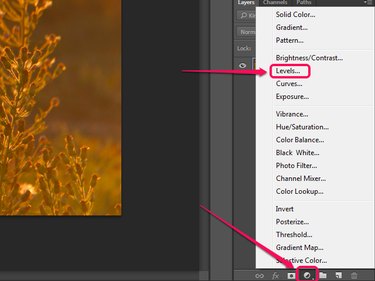
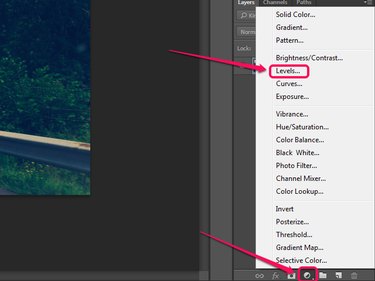
Click the New Fill or Adjustment Layer button in the Layers panel and select Levels. If the Layers panel isn't visible, press F7 to display it.
Step 2
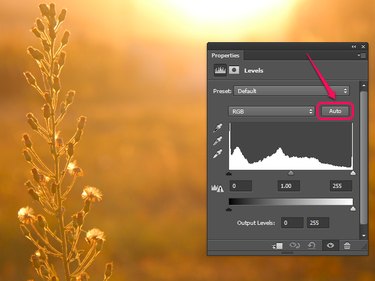
Press the Alt key (or the Option key on a Mac) and click the Auto button on the Properties panel.
Step 3

Select the Find Dark & Light Colors option.
Step 4

Enable the Snap Neutral Midtones checkbox. This option adjusts midtones that are close to neutral so they are mapped to the target neutral color; how much of an effect it has depends on your photo. If you dislike the effect, simply disable the checkbox again. At this point, you can also adjust the options in the Target Colors & Clipping section, if you need to.
Step 5
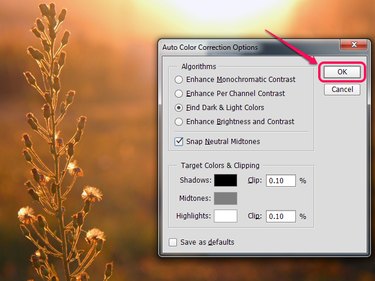
Click OK to apply your chosen settings to the adjustment layer.
Eyedropper Tools
The Levels adjustment layer provides you with three eyedroppers that can be used to set the black, neutral gray and white points for an image. The eyedroppers give you a quick way to adjust the toning of a photo that has parts you know should be black, gray or white but instead appear with a color cast. After you've set the points, you can further adjust the settings of the layer -- but not vice versa, since using the eyedroppers resets any changes you may previously have made to the layer.
The Curves adjustment layer includes the same eyedroppers, just in a slightly different location on the Properties panel.
Step 1
Click the New Fill or Adjustment Layer button in the Layers panel and select Levels.
Step 2
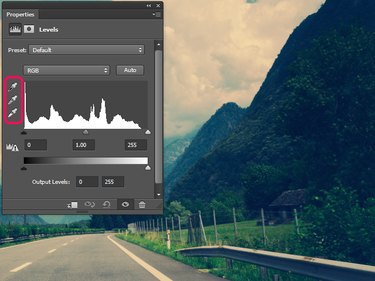
Click the eyedropper you want to use as a starting point to select it.
Which eyedropper you start with depends on your photo. If your photo has an area that should be a neutral gray but is tinted, start with the gray eyedropper; otherwise, start with the white eyedropper for photos with tinted white areas and the black eyedropper for photos with tinted black areas. If a photo has both, start with the predominant one. In this case, we can begin with the gray eyedropper, since both the road and the guardrail are gray but have a yellow tinge.
Click on a part of the image that should match the selected eyedropper -- in this case, a neutral gray -- to apply the color adjustment.
Step 3

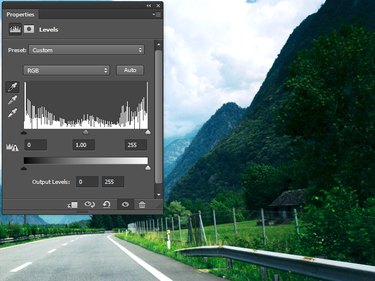
Examine your photo. If you are satisfied with the way it looks, you can stop here. In the case of this image, the white road paint still has a faint yellow tinge and the shadows have taken on a blue cast because of the way Photoshop adjusted the gray point, so the adjustment is not yet complete.
Step 4
Repeat the process with the remaining eyedroppers as necessary. In the case of this image, the white eyedropper was used on the road paint to remove the remaining yellow tinge, and the black eyedropper was used on the empty window of the house on the right to further balance the image, darkening the shadows and removing the blue color cast from them.
Photo Filter
In some cases, it is possible to neutralize a color cast simply by applying a photo filter to the image that adds the color opposite to the cast. This process will not always work, and you may need to adjust the image further after applying the photo filter, but it can be a good starting point.
Step 1
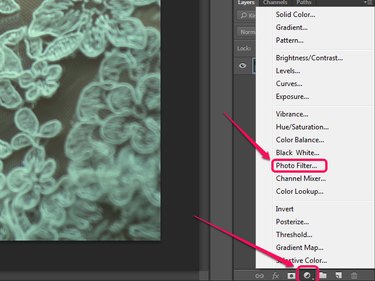
Click the New Fill or Adjustment Layer button in the Layers pane and select Photo Filter.
Step 2
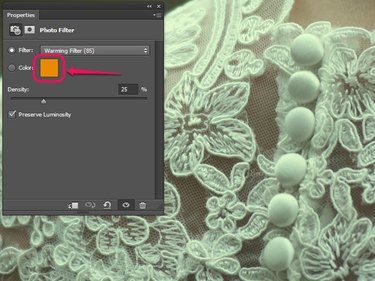
Click the color sample on the Properties panel. Doing this automatically selects the Color option for the photo filter and brings up the color picker dialog box.
Step 3
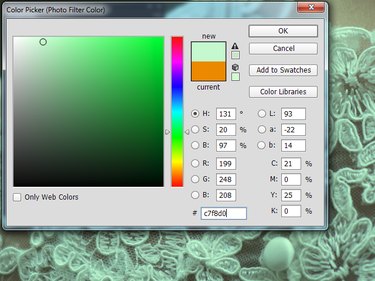
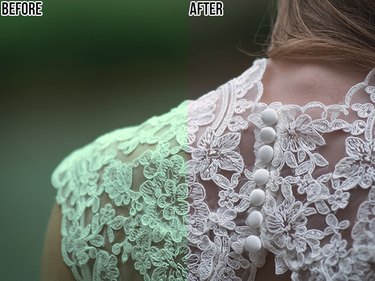
Sample a color that is representative of the color cast you want to remove from the image -- as long as the color picker is open, your cursor turns into the eyedropper tool, so you can just click on the image to sample the color. In this case, the photo has a greenish cast, so we're picking a light mint green from the detailing on the dress.
Step 4
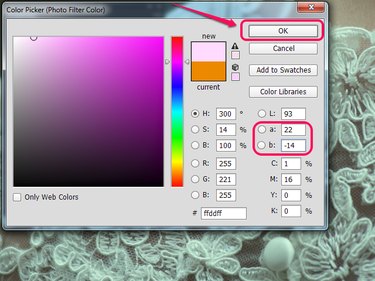
Change the sampled color to its exact opposite by inverting the a and b values in the color picker panel -- if the number in either field is positive, change it to a negative number and vice versa. Click OK.
Step 5
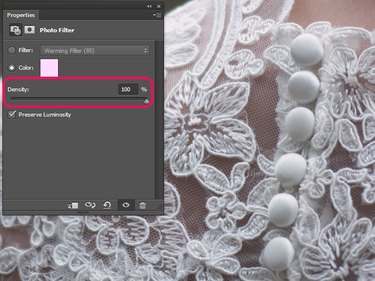
Drag the Density slider to the right until you are satisfied with the appearance of your image. You may or may not need to go all the way to 100 percent density, depending on your photo and how strong the color cast was.