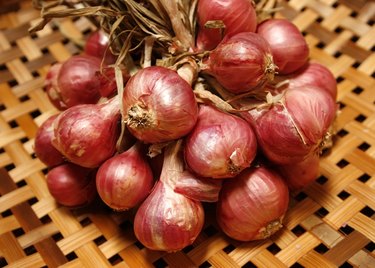
Garden centers have all the seeds and bulbs for which you could wish in spring, but the selection is scantier for autumn-planted vegetables, such as garlic and shallots. Growing shallots from the supermarket is one way to bring the aromatic vegetable to your home garden, and planting sprouted shallots is arguably better than cooking with them (when they sprout, they're past their prime). It's not your best option — ideally, you'd order from a nursery — but it can definitely work.
Planting Times for Shallots
Video of the Day
Shallots are traditionally planted in autumn for harvest in early summer, though you'll also have the option of planting in spring unless you're in a short-season climate. The point of autumn planting is that it gives the bulb time to establish a root system and begin absorbing nutrients from the soil before winter's cold forces it into dormancy. In spring, once conditions are right, the bulb will grow enthusiastically and provide an early season harvest.
Video of the Day
With grocery store shallots, you won't know the cultivar you're growing and its time to maturity, so if you have any doubts about your growing season, this is the best bet.
Planting Shallots in Autumn
Autumn planting time is about four to six weeks before you expect your first killing frost, so choose your bulbs as close to that time as possible. Distributors often treat produce to inhibit sprouting, and planting sprouted shallots is one way to know you have viable bulbs (don't worry if you can't find any; it's still worth a try). Pick the biggest, firmest, and heaviest ones for their size.
Separate each shallot into its two separate cloves and plant them in full sun in rich, well-drained soil at a spacing of 6 to 8 inches. Set them 1 to 2 inches deep in areas with mild to moderate winters or up to 5 inches deep in areas with cold winters, with the pointy end facing upward (that's where the sprout will emerge). Mulch them with a thick bed — 6 inches or more — of straw, shredded leaves, or similarly light material to protect them from winter's frost.
In spring, you'll need to feed them periodically with a balanced 5-5-5 fertilizer as they begin to grow because shallots are heavy feeders. Weed diligently until they're well established or put down fresh mulch to suppress the weeds. They're mature and ready to harvest when their leaves begin to turn brown and fall over, usually in early to midsummer.
Planting Shallots in Spring
If you've missed the window of opportunity for autumn planting, don't worry. Just tuck away your shallots for the winter in a cool, dark place (your fridge or an unheated garage will work) and plant them in spring. Planting sprouted shallots you've newly purchased works too. Shallots need a period of dormancy to sprout, but if they're already sprouting, they've clearly gotten it.
Plant them once the danger of frost and heavy spring rains has passed and the soil is dry enough to be workable. Weed your bed frequently or put down mulch to suppress the weeds and feed the shallots periodically through their growing season. Mulch will help retain moisture, so the shallots shouldn't need additional watering unless you live in a hot or arid climate. Your shallots will be ready to harvest by mid to late summer depending on your local climate.
Harvesting Your Grocery Store Shallots
When the tops of your shallots first begin to turn brown, stop watering them. This helps the bulbs prepare for dormancy. Once the tops are mostly browned, uncover your shallots from their mulch and soil and leave the bulbs exposed for a day or so. Then, carefully lift each "crown" or "nest" of shallots — a cluster of up to 10 or 12 bulbs — from the bed, brushing away any loose soil. Spread them in a warm, dry, well-ventilated place for up to three or four weeks until they feel completely dry to the touch. Then, trim the tops, leaving an inch or two of stem, and place them in a cool, dark place for long-term storage.
Keep back a selection of the best bulbs for planting in the autumn and cook with the rest. They'll keep for months in a cool cellar or the crisper drawer of your refrigerator.
Shallot Seeds and Sets
Growing shallots from the grocery store is always a gamble because you don't know which type of shallot you're planting (and there's always the risk of introducing disease into your garden). Unless you're just trying to rescue some shallots that sprouted in your kitchen — and why not? — it's always best to plan ahead and order shallot seeds or sets from a reliable source. That way, you know they'll sprout, and they should be certified disease-free.
Sets (bulbs) are grown exactly the same way as grocery store shallots. Shallot seeds, like onion seeds, should be started indoors in late winter and then transplanted to the garden once the danger of frost has passed and the soil is workable. At that point, they can be grown like spring-planted bulbs. Shallots grown from seed will make small crowns of only three to four bulbs, but if those in turn are saved and replanted, you'll get the usual 10 to 12.