Since the string trimmer, or weed whacker, was first introduced by George Ballas in the 1970s, homeowners and landscapers have found countless uses for the versatile tool. You can use one to clear a weed-infested field, to edge your lawn and even mow it in a pinch. Some people refer to string trimmers as weed eaters, but that's really a brand name that belongs to a company with that name.
Whatever you call it, if you own a string trimmer, you'll have to replace the string at some point. The procedure varies a bit from manufacturer to manufacturer, so it's always a good idea to check the manual. However, the design of trimmer heads has been standardized enough to make a generic procedure useful for most models.
Video of the Day
Video of the Day
Use the Right String Trimmer Line
String trimmer line comes in a variety of diameters, so the first thing to do is find out which diameter you need for yours. Most electric and battery-powered string trimmers take a 0.065-inch line, but heavy-duty, gas-powered ones take a heavier line with diameters up to 0.11 inches and more. Heavy string won't fit through the holes of a trimmer head that isn't designed for it, but if you somehow do manage to make it fit, it will damage the trimmer. Use line with the recommended diameter for your tool, which is specified in the manual or marked on the line spool, to replace string.
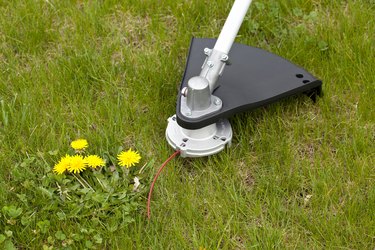
Access the Line Spool
The line spool is under the cover of the trimmer head of the weed whacker, and you have to remove that cover to get to it. Most covers are held by a pair of tabs separated by 180 degrees. Grasp the trimmer head with one hand, reach your fingers around to the sides and press the tabs. The cover will come right off when you pull it.
On some models, you may have to unscrew a lug on the top of the trimmer head to remove the cover. This lug has reverse threads, so remember to turn it clockwise to remove it and counterclockwise when replacing it. When you remove the cover, you can lift the spool off the central spindle. Be careful, because there is usually a spring underneath it, and you don't want to lose that. It has to be there when you replace the spool.
If you have an electric or battery-powered weed eater, be sure to unplug it or remove the battery before disassembling the trimmer head. You don't want the tool to switch on unexpectedly while you're working.
How to Restring the Line Spool
When you remove the spool, pull off any old string still on it and note which side has the writing on it. This is the side that should face out when you replace the spool. The writing should tell you the string size, and you'll also see an arrow that tells you which way to wind when you replace the string.
Step 1: Insert the String
Feed the string into the lock hole on the inside rim of the spool and pull it all the way through until only a few inches remain. Some models of weed trimmers have two lock holes or notches. If yours is one of these, make a crimp in the string and feed the end through the second hole to get a more secure lock.
Step 2: Wind the String
Note the arrow and wind in that direction. Use moderate pressure to keep the string tight. Each successive wind should be parallel to all the others – you don't want diagonal winds that overlap the others or the string might get stuck. Keep winding until you have about 6 inches of string trimmer line left at the end, then wedge it into the nearest notch on the rim of the spool to hold it.
Step 3: Replace the Spool and Cover
Feed the end of the string through the hole or notch on the trimmer head, and set the spool back onto the trimmer head spindle. If you removed a spring from the weed whacker when you took the spool out, be sure to put it back first. If the head cover has tabs, snap it back into place to hold the spool. If the head has a screwable lug, screw it counterclockwise to secure it. Give the string a little tug to free it from the notch and you're ready to go. Don't worry if the string is a little long. The blade on the trimmer cover will cut it back when you start the trimmer.