Things You'll Need
Knife
Latex gloves or cling-form plastic wrap (optional)
For Freezing:
Baking dish or flat baking sheet
For Pickling:
Glass jars
Paring knife or toothpick
Vinegar
Herbs
Flavorings
Home canning kit
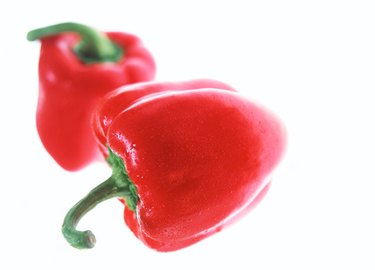
Though they resemble grape tomatoes, cherry bomb peppers are potently hot, with a Scoville rating of 2500 to 5000. Due to their heat level and bright color, cherry bomb peppers are a great addition to dishes such as chili and salsa. Harvesting a crop of these spicy peppers leaves the gardener with a yield of small, thick-fleshed peppers that can be stored as pickled peppers or as frozen pepper pieces.
Freezing
Step 1
Sort the peppers and remove any disfigured or discolored ones.
Video of the Day
Step 2
Wash the peppers in cold water. Remove any grit or dirt and shake off any excess water.
Step 3
Remove the stem and slice each pepper in half length-wise.
Step 4
Seed the peppers. Do this by scraping the seeds from the flesh with your knife or scooping the seeds out with a teaspoon.
Step 5
Chop the peppers into small pieces. Since cherry bomb are a small variety of peppers, you can quarter them.
Step 6
Spread pieces out onto a baking dish or any other flat metal surface that will fit in your freezer. Ensure that no pieces are touching or overlapping.
Step 7
Place the baking dish or tray in your freezer. Remove when pepper pieces are completely hardened. Store frozen peppers in a sealed zip-top bag for up to a year, using as needed.
Pickling
Step 1
Sort the peppers, discarding any odd-shaped or discolored ones.
Step 2
Wash the peppers under cold water. Remove any grit or dirt.
Step 3
Using a paring knife or toothpick, poke two small holes in each pepper. These holes will ensure that the pickling solution inundates the inside of each pepper.
Step 4
Make a pickling solution. Pickling solutions typically consist of water, some type of vinegar and other flavorings and herbs. Recipes for pepper pickling solutions can be found on the Colorado State University Extension website.
Step 5
Pack the peppers into your bottles. Pack them tightly, but allow some spaces between peppers for the pickling solution. Do not press the peppers down.
Step 6
Pour the pickling solution over the peppers, allowing the liquid to work its way down and throughout the peppers. Shake the jar to loosen the peppers if the pickling solution isn't draining well.
Step 7
Process your pepper-filled jars in your pressure canner or water canner. Different models of canners and home canning kits have different instructions, so review your kit's manual for specific details on canning pickles.
Step 8
Store lidded and sanitized pepper pickles for at least a month before opening to allow flavors to develop and the pickling solution to work.
Tip
For safety, you can wear latex gloves or handle the peppers with cling-form plastic wrap.
Warning
Wash your hands well after handling hot peppers. Never touch your face or eyes while working with hot peppers.
Video of the Day