Things You'll Need
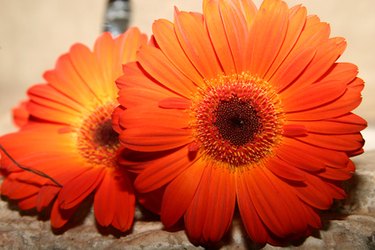
Photo of gerbera daisy
Graphite drawing pencil
Drawing paper
Kneaded rubber eraser
Gerbera daisies are known and loved by flower enthusiasts for their simplicity. It is because of the simplicity of this delicate flower that it is very simple to draw, even for the novice artist. Drawing gerbera daisies is easy to do by following very basic drawing techniques. The key to drawing flowers is to look at the shapes that exist within the flower, and draw each shape that you see. By looking closely at the shapes and layers of the flower while drawing, you will be able to create a very realistic drawing of a gerbera daisy.
Step 1
Locate a photo of a gerbera daisy for reference.
Video of the Day
Step 2
Study the shapes of the daisy, including the long oval petals that overlap in two or three rows and the round center. Notice the size and proportion of the shapes in relation to one another. For example, the petals may be three to four times longer than the width of the round center. Keep this in mind when you begin sketching the flower.
Step 3
Begin sketching the shapes of the daisy with a graphite drawing pencil onto a sheet of drawing paper. First sketch the round center of the flower. Then sketch the longer oval petals that grew along the front row of the round center, paying attention to the unique shapes of each petal.
Step 4
Sketch the additional rows of petals, one row at a time, paying attention to the way the petals are layered. Gerbera daisies can have two to four layers of petals, so sketch one layer of petals at a time.
Step 5
Sketch the stem of the flower, again paying attention to the size of the stem in comparison to the rest of the flower.
Step 6
Add a small amount of shading to the flower by "crosshatching," or crisscrossing, your pencil strokes to create darker areas. Light areas would be left without any crosshatching. The darker the areas need to be, the more crosshatching lines you would create. Crosshatch areas that are shadowed, like the edges of the round center, or the overlapped areas of the petals.
Tip
Have a kneaded rubber eraser available to erase any mistakes while drawing.
Sketch the flower a few times on scrap paper to get the feel of your tools and techniques.
A good rule of thumb in shading is moderation, since heavily shaded areas cannot be erased. Start off with very small amounts of shading and slowly build up.
Video of the Day