Although buying a dog collar may seem like a pretty easy thing to do, there are several choices to make to ensure your dog is comfortable and safe. A collar is essentially a piece of thick material that goes around your dog's neck. Once identifying tags are added, the collar can be used to identify your dog if they were to ever wander off or get lost. Most collars have a small metal loop that a leash can be attached to as a way of restraining your dog. A dog collar isn't just practical, however, it's also an outward display of your dog's style (or rather your style).
Video of the Day
Most collars are adjustable, allowing space for your dog to grow. While it might sound great that you'll only need to buy one collar over the course of your dog's life, considering the wear and tear that happens to a collar while a dog is, well, being a dog, you'll probably want to replace it as needed for safety, smelly, and aesthetic reasons.
Video of the Day
What to consider when purchasing a dog collar
Type: There are several types of dog collars to choose from. To determine which one is best, consider your dog's breed, personality, and daily activities. Standard dog collars are the most popular and have plastic or metal buckles. They are the easiest to put on and take off, they can be worn day and night, and they are best for dogs who don't pull while on walks. Other types of safe collars include waterproof, reflective, and tracking. Most collars are designed for holding ID and vaccination tags and to be worn in addition to a walking harness.
Size: The wrong size collar can lead to serious problems, including your dog getting off-leash, limiting training effectiveness, neck damage, and in some tragic situations, strangulation. To figure out the size collar that fits your dog the best, you should measure their neck. Most collars are listed as small, medium, large, or extra-large, but some are labeled based on the length of the neck. It's important to look at the actual measurements of the collar and compare them to your dog's neck measurements to ensure you're buying the correct size. As a general rule, when your dog is wearing the collar, you'll know it's the right size if you can comfortably place two fingers underneath.
Material: The most prevalent material is nylon, which is good for everyday use—it's inexpensive and it's comfortable. They can, however, trap bacteria and become smelly over time. Waterproof collars are typically made of neoprene, the rubber material used in wetsuits, and are necessary if you live in a wet climate or if your dog does a lot of swimming. They are durable, bacteria-resistant, and easy to clean. Leather dog collars are durable and stylish but tend to be more expensive.
Aesthetics: Finding a style you love is the fun part of choosing your dog's collar. From fun colors to patterns to the overall style, there's something for everyone.
Whether you're a new dog owner or you want to find a better collar that actually fits your dog, read on for the best options.
The best collar for large dogs
Carhartt doesn't just make durable jackets, hats, and more for outdoorsy people, they also make dog collars for outdoorsy dogs. Made of nylon and duck canvas, this collar's rugged two-ply construction will hold up even for the most adventurous dogs. It features a sturdy half-metal, half-plastic buckle that's easy to take on and off, as well as a reflective tag that helps with visibility in the dark. This collar is available in sizes medium and large in six colors.
Measurements: 12" - 18" (medium), 18" - 26" (large)
The best collar for small dogs
If you're looking for a comfortable, lightweight collar for your small dog that just so happens to come in 27 eye-catching patterns, this one's a great option to consider. Not only is it stylish, but it's also made with durable, abrasion-resistant polyester webbing and has a secure, easy-click nylon buckle. You can choose from sizes extra-small, small, medium, or large. Since polyester tends to hold onto dirt and can get stinky, you can hand wash or throw it in the washing machine on a gentle cycle as needed.
Measurements: 8.5" - 11" (extra-small), 9.84" - 14.96" (small), 13.39" - 20.87" (medium), 15.94" - 25.59" (large)
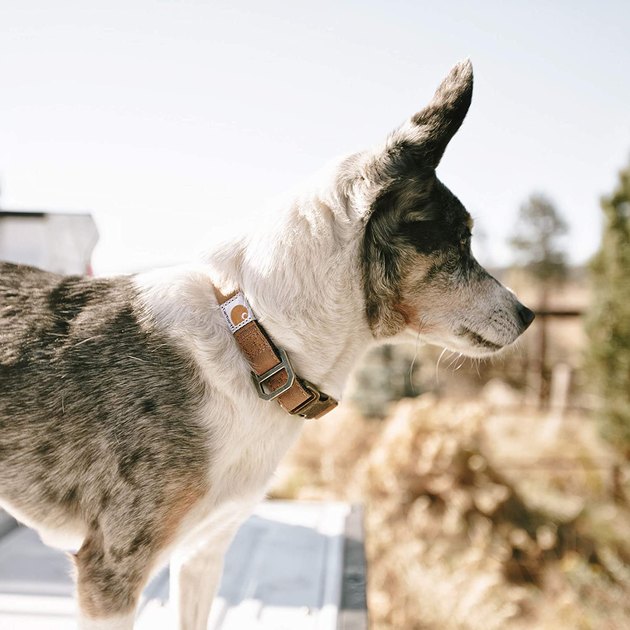
The best leather dog collar

Handmade and hand-stitched leather makes this padded collar look far more expensive than it is. Its buckle closure and brass ring ID holder are durable and lacquered to prevent rust. The collar comes in five two-toned color options in sizes small, medium, large, and extra-large.
Measurements: 11" - 13.5" (small), 14.5" - 17.5" (medium), 18" - 21" (large), 22" - 25" (extra-large)
The best waterproof dog collar
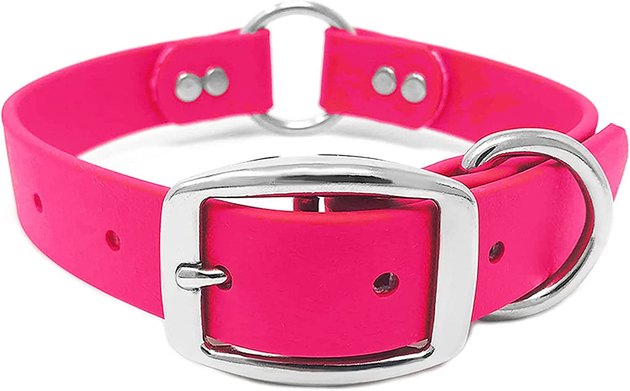
This heavy-duty dog collar is virtually indestructible. It has a rust-resistant, nickel-plated double buckle that allows the collar to pass through the buckle twice for a more secure fastening. Vinyl-coated webbing makes the collar completely waterproof, so you don't have to worry about it getting moldy or holding onto bacteria when it gets wet. Choose from eight bright colors in sizes small, medium, or large, along with the option to purchase a matching waterproof leash.
Measurements: 10" - 14.5" (small), 13" - 19" (medium), 15" - 23" (large)
The best durable dog collar
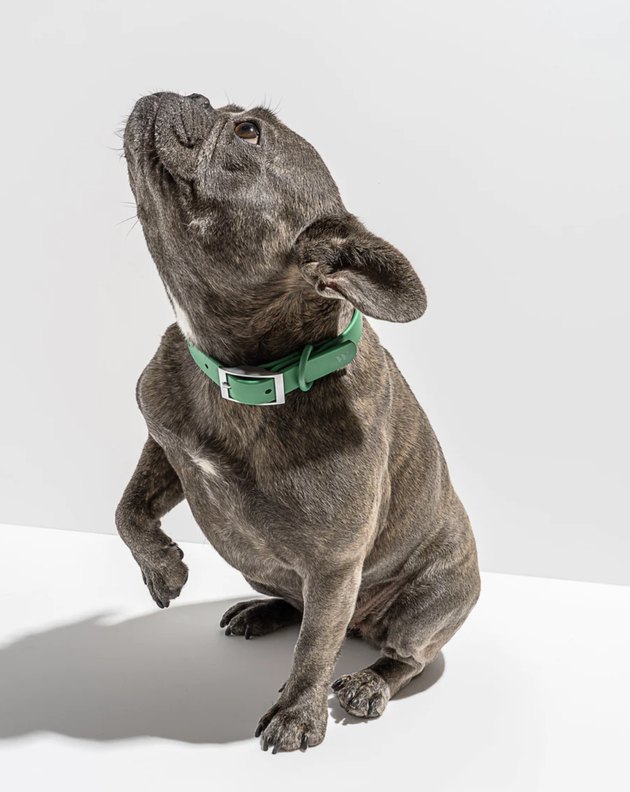
There's a lot to love about this sturdy Wild One collar. It has simplicity, style, durability, and a rubbery matte finish that makes it dirt- and odor-resistant. It's waterproof and super easy to clean as it's constructed from coated nylon straps. The hardware, which includes a zinc alloy buckle and a coated carbon steel D-ring, is made to last and has a high-pull tolerance. You can pair the Wild One collar with a matching leash, harness, and poop bag holder (all sold separately). Choose from 15 vibrant colors.
Measurements: 7" - 10" (extra small), 8" - 12" (small), 12" - 15" (medium), 15" - 18" (large), 18" - 23" (extra large)
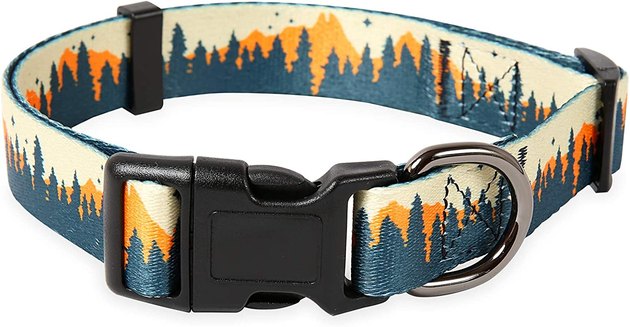
The best reflective dog collar
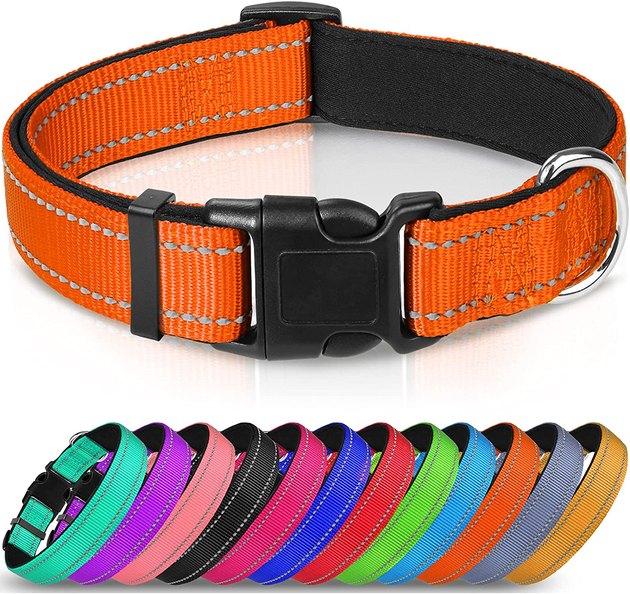
There are two perks with this standard dog collar: It's reflective, which is ideal for dogs who go for walks early in the morning or in the evening, and it's budget-friendly. Made of nylon with padded neoprene rubber material, the collar is durable, quick-drying, flexible, and ultra-soft. It comes in 12 colors and five sizes.
Measurements: 8" - 12" (extra small), 12" - 16" (small), 14" - 20" (medium), 16" - 24" (large)
The best personalized dog collar
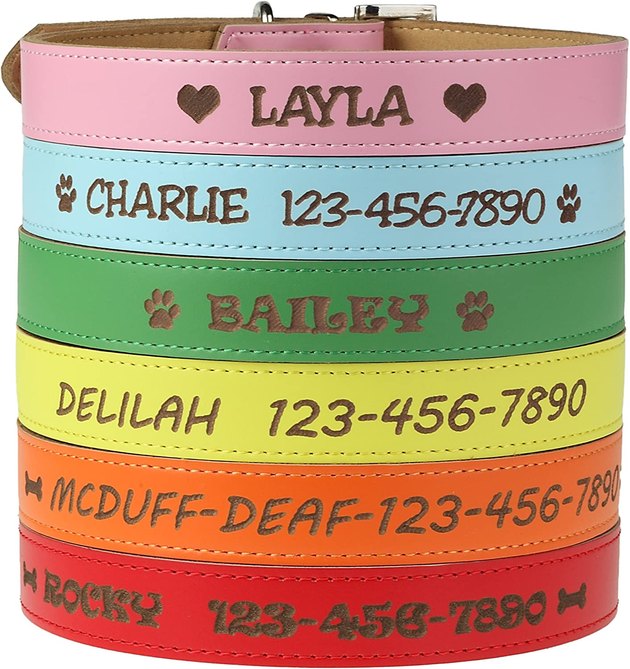
This collar is completely customizable. You can personalize it with your dog's name, your phone number, and any important information—like if your dog is blind or deaf. You can even select one of three designs and text styles. Made of leather with a buckle closure, this dog collar comes in pink, red, blue, green, or yellow and four sizes ranging from extra-small to large.
Measurements: 8.5" - 11" (extra small), 11.5" - 14" (small), 14.5" - 17.5" (medium), 18" - 22" (large)
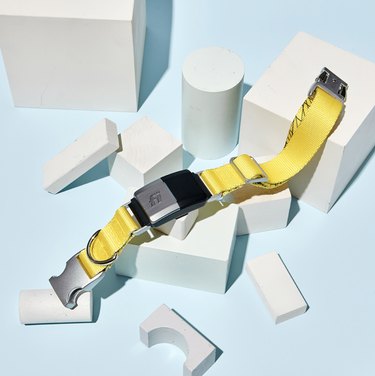
The best tracking dog collar
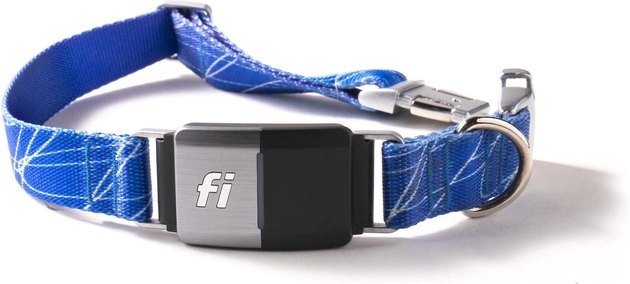
The Fi Series 2 Smart Tracker Collar allows you to know exactly where your dog is at all times using GPS technology and the connected app. If your dog escapes from the preselected designated area, you will receive an alert. You can also keep track of your dog's activity level to ensure they're getting enough exercise throughout the day. The battery life can last up to three months between charges. To gain access to the collar's full capabilities, you'll need to sign up for a subscription. The collar is available in four colors.
Measurements: 11.5" - 13.5" (small), 13.5" - 16.5" (medium), 16" - 22.5" (large), 22" - 33.5" (extra large)