
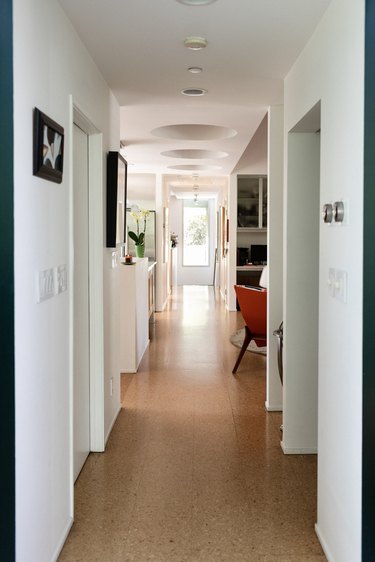
Cork is a durable flooring material that comes from the bark of the cork oak tree. It's a green flooring option that can be subtle, practical and reasonably priced. With basic maintenance, a cork floor should last for years. However, with time, you will get scratches and dents in your cork floor. Some cork floors can be refinished to get them looking new again.
Assess the Damage
Video of the Day
Before you restore your cork floor, determine if the whole floor needs to be replaced or if refinishing is the best course of action. Finishing cork floors can be different depending on the quality of cork, thickness, substrate, method of adherence (glue-down tiles or plank), and finish.
Video of the Day
Here are a few tell-tale signs that it's time to refinish your cork floor:
- Water beading. Water should bead up immediately when it hits the floor. If the floor absorbs water, it will lead to water damage and staining. The means the protective finish is no longer water resistant.
- Deep gouges and scratches. If the damage is limited to a small section or area, it's better to spot repair it. Periodically apply urethane or polish to eliminate small scratches. If your cork flooring is made of interlocking planks, you can replace the damaged one with a new piece. Save yourself time by performing a small repair versus diving into a larger DIY project. If your cork floor has substantial damage, then refinishing the whole floor is the best option.
- Gaps between the floor panels. Cork naturally contracts and expands with changes in temperature. Gaps between the cork tiles may develop, and large gaps are potentially damaging to your floors.
Read more: What You Should Know About Cork Flooring
Refinish or Screen and Recoat?
The general rule of thumb when it comes to cork flooring is if the floor is solid cork and thicker than 4 millimeters, it can be sanded and refinished. A quick way to determine if your floor is thick enough is to do a cross section of your floor. Select an inconspicuous area (like around a heat vent) and measure it.
If the cork thickness is less than 4 millimeters or if you have plank flooring with a cork veneer, extra care must be taken. With thin layers of cork, refinishing will not always be the best course of action because the floors cannot withstand heavy abrasion. In this case, you should screen and recoat the floor (light abrasion and one or two coats of finish) or replace the individual cork tiles or plank flooring.
Because the thickness of the cork products will vary depending on the brand of flooring, always check with the manufacturer or installers before refinishing or repairing your flooring.

Before either refinishing or recoating, you must know the type of finish on your floor. As long as you're working with a polyurethane finish and not wax, you can recoat or refinish immediately. However, wax floors cannot be recoated or refinished until the wax layer is removed.
If you're unsure about what type of finish is on your cork floor, soak a rag with mineral spirits and rub it on a small area of the floor. If the finish turns cloudy and comes off on the rag, then the floor has a wax finish. Polyurethane will not be affected by mineral spirits.
If your cork floor has a wax finish, remove the existing wax finish by buffing with mineral spirits or solvent wax remover and 00-steel wool discs on an electric buffer.
Spot Repairing Cork Floors
If your floor has minor damage, spot repairing is a quick and inexpensive way to repair minor scrapes and dents on your floor.
- Select a wood filler that closely matches the tint of your floor.
- Fill in the dents or scratches with the wood filler. Let it dry completely.
- Once your wood filler is dry, use a fine-grit sandpaper to smooth out the wood filler and make it level with your cork flooring.
- Apply a matching stain on the area to which you applied the wood filler.
- Apply a polyurethane sealant to the repaired area.
Read more: Types of Flooring
Replacing a Cork Plank
While it's possible to replace a damaged plank, it's not an easy process. It requires disassembling the floor all the way to the damaged plank. If it's in the middle, you'll need to tear up a large part of the floor to get to it, replace the plank, and then reassemble the floor. It's also possible to cut a plank out of the middle of the floor with a circular saw and replace it with a new plank, but it's a tricky procedure that requires skill. Either way, this job is better left to a flooring professional who can replace the damaged plank and make it look seamless with the rest of the floor.

Screen and Recoat
Recoating is applying a fresh coat of finish to your cork floors. Unlike refinishing, you are not going all the way down to the original floor, just the top finish — so this method works best for cork floors with thicknesses of less than 4 millimeters.
- Use a pry bar to gently remove any baseboards and shoe molding from around the floor. Label the baseboards with a pencil to indicate its position in the room.
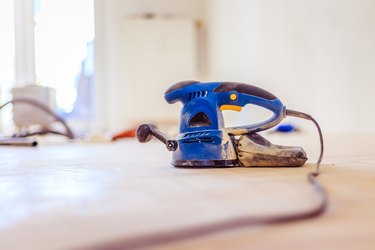
- Fit the sander with a superfine sandpaper or 00-grade wool pad.
- Gently sand the floors. You do not go all the way down to the bare wood — you only want to sand to remove the polyurethane finish.
- Vacuum and wipe down the floor to remove all sanding dust and debris.
- Apply the polyurethane finish with a soft-bristled paintbrush. Start at the edges along the walls work from wet to dry to minimize brush strokes. Be sure to overlap your passes for a smooth finish.
- Let the polyurethane to dry for 12 hours or longer depending on the manufacturer's recommendations.
- Apply a second coat of polyurethane and let the finish dry, if needed.
- Reinstall the baseboard and shoe molding.
Refinishing Cork Floors
If there are substantial signs of wear and tear, like scratches or dents, you should refinish the floors as soon as possible to avoid further damage. The refinishing process uses gentle abrasion to slowly remove the top layer of the floor, revealing a fresh and unscratched layer of the floor.
- Use a pry bar to gently remove any baseboards and shoe molding from around the floor. To help you remember the order in which the baseboards belong, number the back of each piece with a pencil to indicate its position in the room.
- Fit the sander with an 80-grit sandpaper pad.
- Sand the floors. Cork
flooring is soft, so keep the floor sander moving and do not put a lot
of pressure on the sander to prevent damage. After the first pass, sweep
the floor to remove the wood particles.
- Remove the 80-grit sandpaper pads and fit the sander with a finer 100-grit sanding pad. Sand the floors again. Make sure the cork surface is smooth.
- Vacuum the floor to remove all sanding dust and debris. Remove any remaining residue with a tack cloth. Get the floor as clean as possible to ensure a smooth finish.
- Apply the polyurethane finish with a soft-bristled paintbrush. Apply the finish to the edges of the floor along the wall first. Work from wet to dry to minimize brush strokes and overlap your passes for a smooth finish.
- Allow the polyurethane to dry for 12 hours or longer depending on the manufacturer's recommendations.
- Once the polyurethane finish has dried and cured, fit the sander with a 00-grade wool pad. Sand the finish lightly to remove any imperfections. Remove dust from the floor with a tack cloth.
- Apply a second coat of polyurethane and let the finish dry. If needed, apply additional coats of polyurethane, allowing each coat to dry thoroughly before applying the next. Once the finish has cured, you can clean cork floors with a damp mop and water.
- Reinstall the shoe molding and baseboards.