Things You'll Need
Paper clip
Pliers
Poster board
Self-healing rotary cutting mat
Seam gauge
Paper cutters are an essential tool for a variety of projects, from trimming digital photo prints to creating paper mosaics. Industrial paper cutters are expensive and bulky, and hand-held paper cutters designed for scrap booking and craft projects are too small to accommodate large materials such as poster boards. With a little ingenuity, you can make a paper cutter that's a cut above the rest.
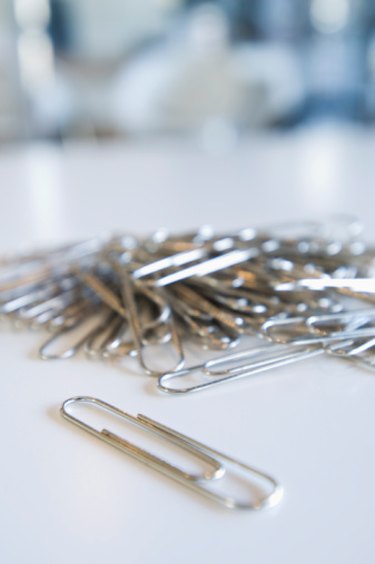
Step 1
Pull out the end of the paper clip to create the blade. The folded portion will serve as the handle.
Video of the Day
Step 2
Position the blade end of the paper clip in the pliers grip. Apply pressure and pull to thin the point. Although a thinner blade will work better, do not pull the tip of the paper clip too thinly, or it will simply bend against the paper rather than cut through it.
Step 3
Align the paper or poster board on the rotary cutting mat. Self-healing mats provide a long-lasting, non-glare surface that can be cut and slashed constantly without showing marks or cutting lines.
Step 4
Place the center of the seam gauge on the paper or poster board in line with the cutting mat lines to prevent crooked cuts. Position the paper clip in the center of the seam gauge and follow the lines to achieve straight cuts.
Tip
Wrap the cutter handle with duct tape or a rubber pencil grip to increase handle stability and create a more comfortable surface to hold during long cuts.
Warning
Always wear safety goggles when working with pliers.
Video of the Day