Things You'll Need
Silicone caulk (approved for kitchen and bathroom)
Caulking gun
Clean cloth or rag
Denatured alcohol
Masking tape
Utility knife or scissors
Nail or wire
Filling in the gaps between your kitchen or bathroom countertops and the adjacent walls is a relatively easy project that will give big returns with little investment in time or money. Countertops that don't sit flush to the wall are unsightly and can even be dangerous, harboring bacteria and attracting household pests. Fill in those gaps and you'll be on your way to a finished kitchen or bathroom that's also safe for you and your family.
Step 1
Clear away any old caulk, food particles or dirt from the gap and the surrounding wall and countertop surfaces. Clean the surfaces with a cloth and denatured alcohol. Do not use rubbing alcohol as it will leave residue and keep the caulk from sticking properly.
Video of the Day
Step 2
Create an 1/8-inch-wide outline along the the edge of both the countertop and the wall, using masking tape. This is where your caulk bead will run. This makes a straight, professional-looking edge and helps minimize cleanup. Apply the tape carefully in a straight line, and rub the tape edges firmly to ensure the tape is secure.
Step 3
Cut the tip off the applicator end of the caulk tube with a sharp knife or heavy-duty scissors. Most caulk tubes feature a score mark on the end, making it easy to cut in the ideal place. Once you have cut off the tip, use a nail to pierce the interior guard to ensure the caulk will flow freely.
Step 4
Load the caulk tube into the caulk gun. Hold the caulk gun over a garbage can or newspaper and depress the trigger to fill the tip.
Step 5
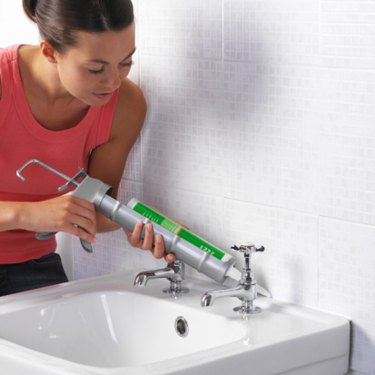
Point the tip of the caulk gun at the seam, just above the surface. Press the caulk gun trigger to apply caulk to the seam, moving in a straight line with steady motion. Create a uniform bead along the length of the seam by quickly releasing the trigger and pressing again as you work. Repeat the process for each gap.
Step 6
Press the caulk into the seam with your finger and remove excess as you go along by smoothing it in a line. Carefully remove masking tape before the caulk begins to skin over. Allow caulk to dry a minimum of 24 hours before exposing the area to moisture.
Warning
Dispose of excess caulk according to the manufacturer's instructions.
Video of the Day