Water hammer comes from water under high water pressure going through the pipes suddenly stopping. When a person turns off the water, water hammer causes banging sounds through the house.
Plumbers repair water hammer by installing a water hammer arrestor. A water hammer arrestor acts like a shock absorber by adding an air pocket in the water line. Making a homemade water hammer arrestor is inexpensive and simple. This project requires basic plumbing skills and tools.
Video of the Day
Video of the Day
How to Make a Water Hammer Arrestor
Step 1: Find the Noisy Faucet
Walk around the house, listening carefully until you find the faucet making the noise. DIY site Family Handyman suggests checking the fixtures for your washing machine and dishwasher, which are often the culprits. Remove the wall, if necessary, so the water lines running to the faucet are exposed.
Step 2: Turn Off the Water
Find the water cut off under the house where your water comes in and turn the handle until it turns off. Go in the house and turn on the faucet. If the water runs, turn the handle on the water cut off until the water in the house stops.
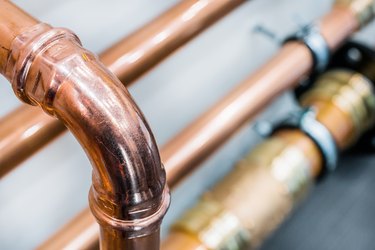
Step 3: Locate the Hot Water Line
Locate the hot side of the horizontal run of the copper line running to the faucet. Sand a 1/2 inch area. Cut the copper on the hot water line in the center of the sanded area using copper pipe cutters.
Step 4: Drain Water and Blot Dry
Drain the excess water in the pipe into a bowl. Let the water line drain completely. Dry both cut sides of the copper with a paper towel.
Step 5: Sand Ends of Pipe
Sand both ends of one of the 3/4 by 12-inch copper pipes and put a thin coating of flux on both ends using the flux brush. Put flux on the area of the horizontal cut copper pipe in the wall. If the cut horizontal water line is 1/2 inch, use a 1/2-inch by 3/4-inch by 1/2-inch copper tee, but if the copper line is 3/4 inch, use the 3/4-inch by 3/4-inch by 3/4-inch tee. Flux all the inlet openings on the copper tee.
Step 6: Insert the Copper Tee
Insert the copper tee into the cut water line, so both sides of the cut pipe are in the tee with one opening on the tee facing straight up. Insert one end of the fluxed 12-inch copper pipe into the tee outlet that is facing up. Flux the 3/4-inch cap and place it on top of the 12-inch copper pipe.
Step 7: Place a Fire Extinguisher Nearby
Place a fire extinguisher next to the work area. When you start soldering the pipe, work cautiously.
Step 8: Heat the Fluxed Areas
Light your propane torch and heat the fluxed areas. When the solder starts flowing freely all the way around each area, it is sealed. Solder every area where you applied flux.
Step 9: Repeat on Cold Water Line
Repeat the whole process on the cold water line. Each side of the faucet needs a water hammer arrestor.
Step 10: Check for Leaks
Turn the water on. Check both sides of the faucet and check for leaks. If there is a leak, cut off the water, drain the system through the faucet, flux around the leaking fitting, heat the leaking area until the flux starts flowing and retest the system.
If you still hear a hammering noise, put in more water hammer arrestors near the other faucets in the house.
Tip
Unnecessarily high water pressure can also cause water hammer. Bob Vila's website suggests tackling the problem at the source, by adjusting your water pressure reduction valve to below 50 psi.