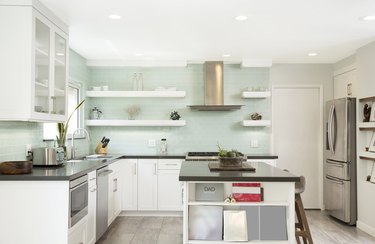
Free-hanging kitchen cabinets typically anchor to the ceiling above a kitchen island or peninsula. These cabinets help homeowners get maximum storage out of a small space in a kitchen. You can modify a set of wall cabinets to make them strong enough for a ceiling mount. Hanging the cabinets from a wooden ceiling beam or soffit is also critical for the integrity of this installation.
First: Have a Safety Plan
Video of the Day
Hanging cabinets from the ceiling of a kitchen can be completed as a do-it-yourself project, but for safety's sake, you should have at least one person assisting you. That's because cabinets are heavy and awkward, and you'll need someone to stabilize the cabinet while you drill it into the ceiling. Consider building a sturdy brace or platform for the cabinets to sit on until the mounting procedure is complete for further safety and stability.
Video of the Day
Strengthening Cabinets for Ceiling Installation
Unless you have purchased cabinets intended for ceiling installation, they'll need to be modified. If you take a cabinet that's meant to be mounted to a wall and try to screw directly through the top and mount it to the ceiling instead, you'll be drilling through weak particleboard. This significantly weakens the cabinet and it may not even be able to support its weight, much less the weight of any items you store inside it. Instead, you need to attach a piece of solid wood to the top of the cabinet to provide a sturdy and strong material to drill into.
Most cabinets have a "lip" on the top, which conveniently allows you to hide the cabinet hanging rail or mounting piece that you'll attach to the top of the cabinet. A 1x4 cut to the appropriate length should fit snugly behind that top edge on most cabinets. With this piece of wood flush against the back edge of the top of the cabinet, use no. 6 or no. 8 screws to drill through the wooden wall-mount bracket on the back of the cabinet and into the side of the new top-mounted bracket. This wood-to-wood connection provides the greatest strength.
Finish attaching the new piece of wood to the cabinet by adding a screw through the top edge of the cabinet and into the wood on either side.
Measuring for Cabinet Placement
First, use a stud finder to mark the center of the wooden joists in the ceiling, as drilling into wood will provide the most support for the cabinets. Measure the distance from the back edge of the cabinets to the middle of the wooden brace you added. Transfer that measurement to the ceiling and snap a guide line to help you place the cabinets in the correct position before drilling. Also, mark on the ceiling where the front edge of the cabinet will rest and use the stud finder to make sure wood lies behind this line as well.
Hanging Cabinets from Ceiling Procedure
Have an assistant move the first cabinet into position and fully support its weight until you've sunk all screws into the brace. Using screws specifically designed for mounting cabinets (such as GRK Fasteners' low-profile cabinet screws), drill up through the top of the cabinet, through the wooden brace and into the wooden ceiling joist. Place screws this way every six inches. Once these screws are in place, the cabinet is capable of supporting its weight.
Next, drill screws through the front edge of the cabinet and into the ceiling. This provides a small amount of additional stability and tightens up the front edge of the cabinet to prevent sagging. You should see the marks previously made to indicate the location of the ceiling joists. Predrill holes to avoid splitting the laminate and complete the installation by sinking these final screws.