Before installing tile on walls or floors pretty much anywhere in the house — but especially the bathroom — you need to install cement backerboard. Durock, manufactured by United States Gypsum (the company that makes Sheetrock), is one of the most popular brands of cement board, but there are others, including HardieBoard, Wonderboard, and PermaBase, that install the same way.
Cement board provides a flat substrate for tile that won't expand and contract like wood, and it's waterproof too but only if you tape the joints after hanging the sheets. The process is similar to taping drywall joints, but it's a lot easier because the joints aren't visible, so they don't have to be pretty. You don't want to skip it, or you may end up with loose tiles.
Video of the Day
Video of the Day
Materials for Taping Cement Board Seams
You need three things to make waterproof seams for Durock and other brands of cement backerboard: tape, taping compound, and a taping blade.
The tape you use for taping cement board seams is similar to fiberglass mesh drywall tape. It's coated with an adhesive to make it stick to the seam, which makes the whole process much simpler than it would be if you had to embed it in taping compound as you do with paper drywall tape.
The taping compound you need for this job is thinset mortar. If the product you buy doesn't already have a latex additive mixed in, it's good to mix some in yourself. It keeps the mortar flexible and prevents cracking.
You can spread mortar for Durock with any type of flat implement, such as a paint scraper, but the best tool to use is a 4-inch drywall taping blade. It's wide enough to straddle a seam without spreading mortar in places you don't need it.
How to Tape Durock Joints
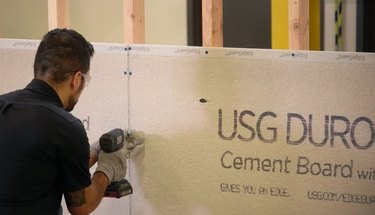
Durock comes in 3 x 5-foot sheets. Because of the weight of the material, they are easier to handle than 4 x 8 sheets. These sheets get nailed or screwed to studs or subflooring with roofing nails or cement board screws, typically leaving a 1/8-inch gap between sheets.
Cover each seam with mesh tape by cutting the tape to length and pressing it down onto the cement board. The tape should overlap at intersecting joints, so it's fine to cut it a little short when you come to one. Once the tape is in place, cover it completely with thinset using your 4-inch blade and then scrape the mortar flat. That's all there is to it — you don't need to flatten the joint any more than that or add a second coat.
Taping Edges That Meet Drywall and Corners
Unlike finishing drywall, you don't use corner bead for outside corners. When you come to an outside corner, just cover it with tape as best you can. If you can't get the tape to stick, try overlapping two pieces to provide more adhesive area on the sides. Spread and scrape mortar on the joint just as you would for a flat seam. Inside corners are even easier: Crease the tape down the middle, stick it into the corner, cover both sides with mortar, and scrape it.
When you're building a tub enclosure or installing a tile backsplash and the edge of the cement board butts against drywall, you can still use the fiberglass mesh tape. After sticking it on, coat the cement board side with thinset and the drywall side with drywall joint compound. You'll need extra coats of joint compound to get a flat seam on the drywall side, but it's usually better to wait until after you've installed the tiles on the cement board before applying them.