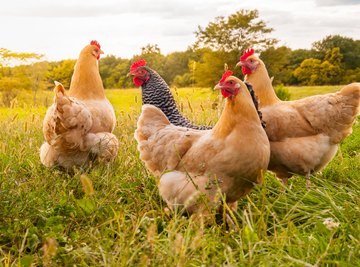

Chickens not only make for interesting and fun pets, but they also make for interesting and fun subjects of science projects. Students can observe and record how changes in the environment affect chicken development or behavior. They can also experiment on eggs or incubate and hatch fertilized eggs.
Music
Changes in the environment can produce changes in a chicken’s behavior. Testing whether music affects egg production may reveal just how sensitive a chicken is to its environment. Carefully measure and record feed rations to ensure that changes in feeding do not affect the results of the experiments and keep water free choice to keep the experiment humane. Also, record a control week before and after the experiment weeks in order to have sufficient data for comparison. To test music’s effect on egg production, choose a style of music or a single song and play it all week in the coop. Try different music the following week and record and compare the results.
Light
Egg production generally decreases in winter. However, testing whether more hours of light produce more eggs can answer whether the decrease in production is caused by fewer daylight hours or colder temperatures. Again, carefully measure and record feed rations to ensure that changes in feeding do not affect the results of the experiments and keep water free choice to keep the experiment humane. Also, record a control week before and after the experiment weeks in order to have sufficient data for comparison. Install a low-wattage light on a timer in the hen house. Add one hour of extra light inside the hen house for the first week and record production. Each week, add an additional hour of light until you reach a total of 16 hours of light including daylight. Record and compare the results.
Pores in Eggshells
Developing chicken embryos need oxygen to live and grow, yet eggshells appear hard and solid. Prove that eggshells are not as solid as they appear and that they allow water to penetrate the surface of the egg. Use about five eggs for this project. Mark each egg with an identifying number or letter using a crayon. Weigh each egg on a scale capable of distinguishing changes in weight as small as 0.1 grams. Record each weight. Boil the eggs in a pot of water for 1 minute and then let sit in the hot water for 25 minutes. Weigh the boiled eggs again and compare the weights.
Hatching Eggs
Incubating and hatching fertilized eggs is a fairly involved project, but it can yield a wealth of information. Eggs must be candled, have a bright light shown behind them to reveal a shadow of their contents, to ensure they are fertilized eggs. The eggs must be kept in a warm, humid environment and turned three times a day for 21 days. Just hatching a fertilized egg is a great science project. However, testing how changes in the environment during incubation affect the embryo gives the student a better understanding of a mother hen’s responsibilities when she is brooding on a nest.
References
About the Author
Elizabeth McNelis has been writing gardening, cooking, parenting and homeschooling articles from her St. Petersburg urban homestead since 2006. She is the editor of “The Perspective,” a homeschooling newsletter distributed in Pinellas County, Fla. and writes a blog entitled Little Farm in the Big City. McNelis holds a Bachelor of Arts in professional and technical writing from the University of South Florida.