Things You'll Need
Ribbon
Scissors
Wire

Christmas bows can be used for decorating the house, and for decorating presents during the holidays. A single bow can top a present -- it can work as a centerpiece for a table, or it can be attached to the Christmas tree as an ornament. Additionally, a larger Christmas bow may be the perfect accent for a wreath or a Christmas gift basket. There are many uses for Christmas bows. You can make your own Christmas bows -- and all you need is a piece of ribbon.
Step 1
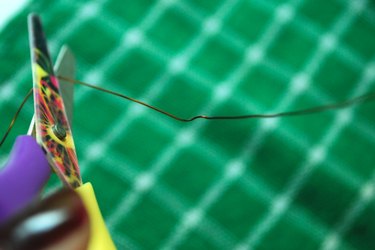
Cut a piece of craft wire about three inches long using scissors or pliers. It will be used to tie the bow and to keep it in place.
Video of the Day
Step 2
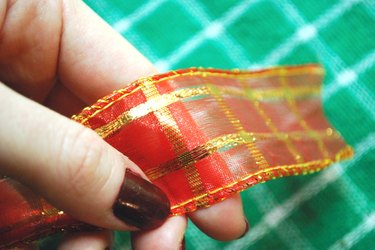
Choose a ribbon that is at least 5 yards long. The thickness of the ribbon doesn't matter. Choose a color, size and texture which you like. It can be smooth or velvety, thick or thin, red or green -- the choice is up to you. The ribbon can be wired or unwired, but wired ribbon is easier to work with. It is stiffer and easily bends into shape, as compared to soft, unwired ribbon.
Step 3
Unroll the ribbon from its bolt or spool and using scissors, cut off a piece about 5 yards long for a medium-sized bow. If unsure how much ribbon to cut, keep the ribbon on its spool uncut. You can cut it once you're done making the Christmas bow. Straighten out the ribbon using your fingers.
Step 4
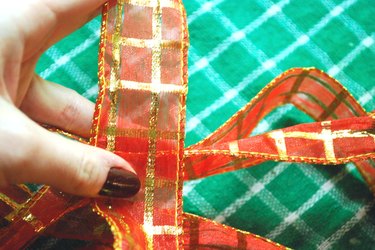
Grab the ribbon about halfway from its end, or two yards from its end, and pinch it in the middle. Make a loop on one side of the pinched middle.
Step 5
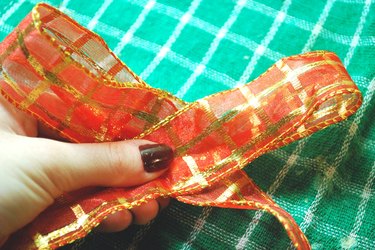
Make a loop on the other side. You will have two loops, which will make the ribbon look like a bow tie.
Step 6
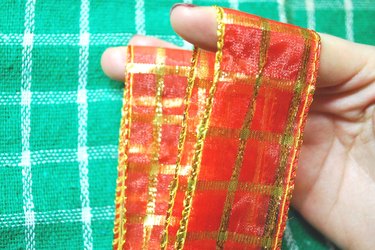
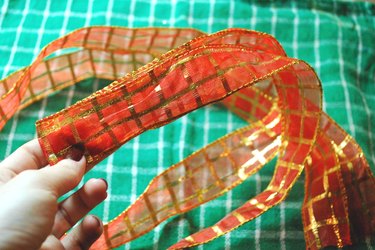
Hold the ribbon with one hand -- in the middle, where the pinch used to be. Using your other hand, place your pointer finger into one loop and your middle finger into the other loop. This is done to ensure that the loops are the same length. If not, adjust until both loops are even.
Step 7

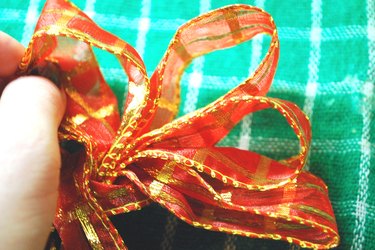
Continue making loops. First on one side, then on the other side. Stop when you think you have enough loops -- and your bow looks full. At this point, you should have about 8 or 10 loops.
Step 8
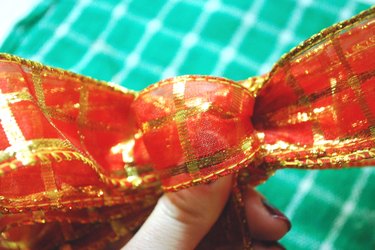
Make a final, smaller loop in the center of the bow. Wrap it around the center once, and leave it loose. It should be smaller than the rest of the loops, about 1/3 the size.
Step 9
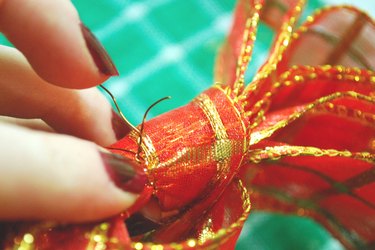
Take the piece of wire and thread it through the center of the loop you just made -- then around the center of the bow. Tighten the wire and twist it into place.
Step 10
Spread out the loops of the bow, so that the bow looks full and it's without gaps.
Step 11
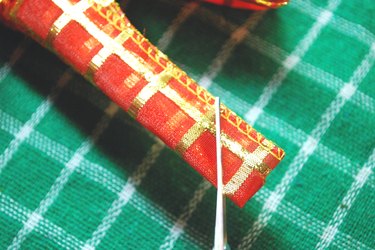
Take the hanging ends of the bow and fold them together in half vertically. Slant your scissors and cut off the ends diagonally to a length you desire. Unfold, and you should have W shaped ends.
Tip
For a more casual bow, instead of making a last loop, tie the ribbon around the center tightly. Instead of being spread out all around, this kind of bow will have an even number of loops on each side.
Video of the Day