Things You'll Need
Safety glasses
Gloves (optional)
Glass cleaner
Paper towels or clean rags
Straight edge
Glass cutter
Lubricating oil
Glass pliers or grozing pliers
Glass grinder (optional)
Carborundum stone or silicon carbide sandpaper (optional)

Knowing how to cut and smooth glass edges is useful for a variety of applications such as replacing windows, making stained glass, or putting together picture frames. Cut glass by scoring a mark on it with a rolling wheel made of a hard substance such as diamond or tungsten carbide. Then break it apart by applying pressure on both sides of the cut. Finally, smooth the edges with a glass grinder, file or sandpaper.
Preparing glass for a project
Step 1

Put on the safety glasses and gloves. The gloves are useful if you are uncertain about how to handle glass and want to avoid cuts. Beware that gloves provide only partial protection. Some people prefer not to use them because it can make handling the glass a bit awkward.
Video of the Day
Step 2

Clean the glass thoroughly. Dirt or grit causes problems when scoring the glass and quickly dulls the glass cutter.
Step 3
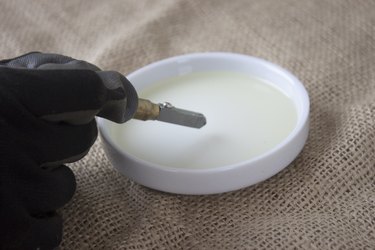
Lubricate the cutting wheel by putting oil into the reservoir on the glass cutter, or dipping the wheel in a bit of oil.
Step 4
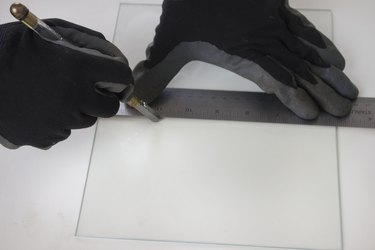
Draw the wheel along the glass from edge to edge only once in a slow, even motion. At the far edge of the cut, roll the cutter gently over the edge of the glass, easing up a bit so it doesn't jam onto the cutting surface. There should be a light scratching or crackling sound indicating the wheel is marking the glass. Do not press too hard or the glass might break from the pressure. Making a scoring line adequate to cut the glass does not require a lot of pressure.
Step 5

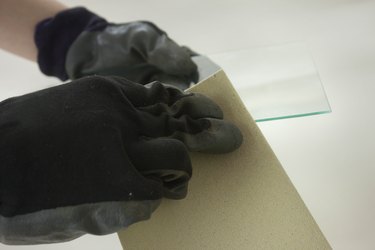
With the score line face up, grip the edges of the glass carefully with your thumbs on either side of the score line. Twist your wrists in opposite directions. The glass should snap apart at the score line. For smaller pieces that are difficult to grip, use the glass or grozing pliers to hold the glass gently but firmly on either side of the score line and use them to twist in opposite directions. Larger pieces with a straight score can be laid along the edge of the work surface (again, with score line face up) with one hand holding the larger side down on the work surface, the score line and smaller piece held in the other hand. Apply a slight downward pressure to the piece hanging over the edge to snap it at the score line.
Step 6
Use the glass grinder, carborundum stone or silicon carbide sandpaper once the glass is broken to smooth the edges. The glass is held flat on the surface of the grinder and pushed gently against the rotating head of the grinder to smooth and shape the edges as needed to fit the pattern. The carborundum stone or sandpaper is held at an angle and rubbed along the sharp edge, pushed along from the flat surface toward the cut edge to smooth it. For best results do not draw it back and forth along the sharp edge, only smooth it in one direction.
Tip
Use a flat, clean surface to cut the glass on and make sure the entire glass piece is supported so that none of it is hanging off the edge. Standing while you cut glass gives you better control over the movement of the glass cutter. The glass cutter can be drawn either toward or away from you, depending on what feels most comfortable.
Video of the Day