
How to Wire Three-Phase Electrical Panels

While most residential electrical systems rely on single-phase power supplies, industrial and commercial applications require three-phase systems to deliver the high voltage necessary for large-scale manufacturing purposes.
Things You Will Need
- Padlock
- Flathead screwdriver
- Megger
- Three-phase electrical breaker
- Electrical panel rated for three-phase breakers
- Wire strippers
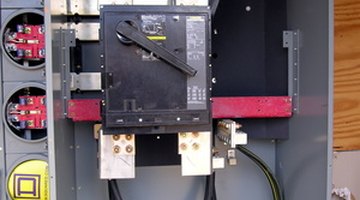
Three-phase electrical panels differ from single-phase panels due to the three power leads that are used in three-phase systems.
-
Shut the main power breaker off at the breaker box, then padlock it to prevent anyone from turning it on while you work on the circuit. (This will only be necessary if you are adding a circuit to a three-phase panel that is already active.) Make sure the panel is rated for three-phase electrical breakers.
-
Unscrew and remove the breaker panel cover using a flathead screwdriver, then test the main power terminals with a Megger to confirm that the power is turned off.
-
Install a three-phase breaker into one of the breaker slots using a flathead screwdriver.
-
Run three wires from the electrical panel to the device you wish to send power to. Strip the ends of the wires using wire strippers, then insert each of the three wires into one of the three breaker lugs and terminate them using a flathead screwdriver. No neutral wire is needed.
-
Run a ground wire from the panel to the electrical device. Strip the end of the wire using wire strippers, then terminate the wire on the panel’s grounding bar using a flathead screwdriver. Repeat the same process for additional circuits.
-
Reinstall the panel cover using a flathead screwdriver. The panel is now wired. Terminate all circuits into their termination points on the electrical devices, and test the circuits and devices with a Megger before restoring power.
References
- "Electrician's Pocket Manual" (Pocket References (McGraw-Hill)); Rex Miller; 2005
Resources
Writer Bio
Eric W. Thompson began his writing career in 1996 and is now a member of the All-USA Academic Team, having been featured in "USA Today" as one of the top 20 community college students in the country. He is currently taking a break from earning an undergraduate degree in contemplative psychology at Naropa University.
Photo Credits
- electrical panel switch image by jimcox40 from Fotolia.com
- electrical panel switch image by jimcox40 from Fotolia.com
More Articles