Linoleum flooring can be found in many homes and apartments because of its inexpensive installation and easy-to-clean surface. But sometimes, an upgrade is in order.
One simple way to transform your old linoleum bathroom or kitchen floor is by using peel and stick vinyl tiles, which can be found at most hardware stores. Peel-and-stick tiles are affordable and easy to apply, even if you have no previous flooring experience, and can usually be done right over your existing flooring. To lay your peel-and-stick tile over existing linoleum, you'll need a clean, uniform surface, a handful of basic tools, and just a bit of time and patience.
Video of the Day
Video of the Day
Peel and Stick Vinyl Over Linoleum
If you're looking to upgrade your linoleum flooring with new peel and stick tiles, you're in luck. Linoleum floors are one of the easiest types to cover up with another type of material, and adding peel and stick vinyl over linoleum is generally a simple project that shouldn't take too much time to execute.
As with other types of flooring with which you wish to cover your linoleum, the condition of your flooring should be good enough to support the new materials, which will ensure an intact job over the long haul. Linoleum flooring should be free of cracks, blisters, tears and peeling corners or edges,. It should also be firmly attached to the sub-flooring beneath it if you want to lay your peel and stick tiles down right over it. Otherwise, you may need to remove your old flooring.
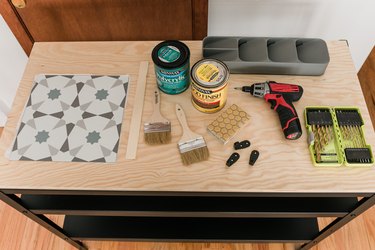
What You’ll Need
Before installing vinyl tile over an existing vinyl floor, you'll need to prepare the area with a good cleaning. The adhesive backing on peel and stick tiles works best on smooth, slightly porous surfaces, so the very first thing you'll need to do is sweep any dirt and debris from your floors. Next, use a heavy-duty cleanser to rid the surface of any grime, especially if you have anything sticky or waxy resting on the surface. If your flooring is uneven, cracked or warped, you can create an even surface for your tiles to stick to by applying a thin coat of floor leveling compound with a trowel.
To lay your vinyl tiles down securely and properly, you may also need some chalk, a piece of paper and a utility knife.
How to Apply the Tiles
First, find the center of your room by snapping a chalk line between both sets of opposing walls so that a cross forms in the middle. Before you remove the peel-off backing of your tiles, rest them in place according to the center line to make sure they sit the way you like. Once you have everything in place, remove the backs and place your tiles down onto the floor one at a time. Work from the center of the room outward toward the walls, stopping every few tiles to roll them with a rolling pin, which will help them lie flat and stick to your flooring.
When you reach the perimeter of your room, or if you run into any standing fixtures like a toilet or sink, you will likely need to cut some tiles down to size. To do this, you can take a piece of printer paper and cut it to the size and shape of your tile. Then, use the paper to measure and fold it where it hits an edge. Use the folded piece of paper to draw a line on the back of your tile, and then cut the line with a utility knife for a perfect measurement. Once you're finished, give your flooring about three days to set before you use it.