Design
A traditional barn door design is the so-called batten door. It consists of vertical boards on the exterior face and horizontal boards (battens) across the back or inside. This perpendicular pattern gives the door strength and helps minimize warping. Two doors swinging opposite ways and meeting in the middle when closed is a common feature of barns.
Materials
Video of the Day

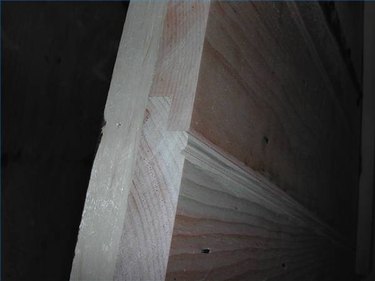
Shiplap pine is a practical building material for barn doors. The term "shiplap" refers to the rabbet cut on the edge of each board. When the boards are placed edge-to-edge, these joints overlap. Shiplap pine typically comes in 8-inch, 10-inch and 12-inch widths and is commonly available at lumber yards and home supply stores. The choice of fasteners is an important one. Since the barn door will be exposed to the elements, hardware that resists corrosion is essential. Stainless steel, hot-dipped galvanized, or ceramic-coated deck screws are suitable for fastening the battens to the vertical planks.
Video of the Day
Measuring
Measuring the doorway horizontally and dividing by 2 yields the rough width of each door. Making the doors a bit over-sized, then trimming to the exact size as a last step, allows for a custom fit. This is an important detail because a door opening will often be out of square, having different vertical measurements on one side and the other, and different horizontal measurements at the bottom and top.
Cutting
Vertical boards are cut to the rough height of the door opening then laid out with shiplap edges joining to form the door's exterior. Wider boards and narrower ones can be combined to achieve the desired width. Next the horizontal battens, as many as needed to go continuously from top to bottom and are cut to a length that will span across the vertical boards from side to side.
Assembly
Once all the boards are loosely assembled they are ready to be screwed together. If screw heads are not to show from the outside, all the battens are screwed to the vertical planks from the back (batten side). A "W" pattern of screw placement makes for uniform attachment.
Trimming
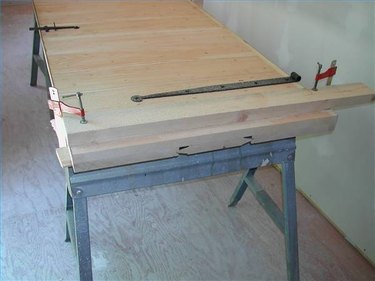
Now comes a critical step: precisely measuring the opening, and trimming the doors accordingly to fit. The doors are set on saw horses so that the edges overhang, allowing clearance for a circular saw. Clamping a straight edge to the door to guide the saw along a precise line that's carefully measured and marked helps to complete the cut.
Final Fit
There has to be some clearance all the way around to allow the door to swing shut without binding. The door is set in its opening on shims and the shims are adjusted so there's a uniform 3/16- to 1/8-inch space underneath, along the side and at the top. Trial and error here is part of the process. It's better find that the door needs a lmore trimming than to find that it's been trimmed too much. One last check for fit, a final trimming if necessary, and the doors are ready to be hung.