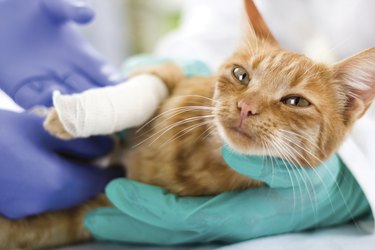
If your cat has suffered a broken leg, call your veterinarian immediately. While it is important to take your cat to the vet as quickly as possible, you may need to perform some first aid before hopping in the car. If the fracture occurs on one of the lower leg bones, your DVM may advise you to protect the broken leg by attaching a splint to it. A splint, which is composed of some cushioned material, a semirigid or rigid brace, and a bandage to keep it steady, helps to protect the leg and prevent the broken bone from worsening.
Video of the Day
Your veterinarian will take X-rays to determine how extensive the fracture is. It is possible that your DVM might not advise you to create a splint. In order for a splint to be effective, it must extend from above the fracture to below the fracture, which is very difficult to accomplish on an injured cat who is awake and in pain. Whatever your veterinarian tells you to do, follow their instructions very carefully.
Video of the Day
Simply applying the splint at the injured area can add weight to a broken bone, exacerbating pain and damage. Because it may cause further harm, avoid splinting fractures of the upper leg bones. Splints should only be applied below the knees on hind legs or below the humerus on front legs.
Healing a cat’s broken leg
A single broken toe in a cat's paw doesn't usually require a splint or surgery but multiple broken toes will require at least a splint. Splints do not help broken legs heal; your veterinarian will need to set the bone to start the healing process. After aligning the broken pieces of bone, your veterinarian may perform surgery to insert surgical plates, wires, screws, or pins to keep the bone fragments from separating or shifting. In the worst-case scenario, amputation might be necessary, though this is rare.
During the next couple of months, the bone will heal. Never try to set a broken bone yourself, as this can cause your pet a great deal of pain and further damage to the cat's leg. You might need to help your cat get in and out of the litter box for a while.

Cat splint materials
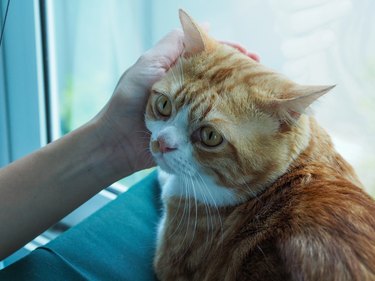
As soon as you see your cat's leg is injured, pick them up gently. Reassure them while cradling them gently in your arms, taking care not to hurt the injured leg. Have a helper locate everything you need but place a sterile bandage over any bleeding wounds before proceeding.
Cotton material, towels, or clothing can cushion the broken leg, while kitchen utensils, popsicle sticks, a metal rod, rolled-up newspaper, magazines, or cardboard make good braces; anything rigid and of an appropriate size will work. A medical bandage is the perfect supply for securing a splint to your pet's leg, but you can use masking tape too.
How to make a homemade splint for your cat
Enlist a helper if possible before attempting to splint a cat. With your cat still cradled in your arms, try to present the broken leg to your helper, who can make the splint. If you are alone, you may try placing your pet on a surface with their injured leg up. Use blankets, towels, or pillows to cushion the surface if necessary.
- You don't want to directly move or manipulate the injured leg. Without moving the cat, gently wrap the cushioning material around the broken limb.
- Bring the brace under the cat's leg to provide support. Ensure it extends from above the fractured area to below the fractured area. Exercise extreme caution, particularly if splinting a rear leg, so as not to disrupt the leg's natural position and cause further injury.
- Gently wrap the bandage around the broken leg. The bandage should be firm but not so tight that it disrupts blood flow or causes additional discomfort.
- Tape the bandage in place to keep the cushioning and brace materials secure.
Observe and monitor your cat
Understandably, injured cats are often frightened, anxious, and in pain. This can cause them to try to lick their broken limb or remove the splint. Accordingly, it is important to monitor your cat while traveling to the veterinarian to ensure they do not cause further injury or remove the splint. This is another reason that it is helpful to have a partner who can assist you in caring for an injured cat, including driving you to the veterinarian while you hold your pet. Do not allow your cat to lick, chew, or paw at the splint or injured appendage.
The bottom line
Pet owners should know that a broken leg is a pet health emergency. Call your veterinarian immediately if you think your cat's leg is broken. Depending on the injury location, they may ask you to create a splint to stabilize your cat's leg before you drive to the veterinary hospital. A splint will not heal the broken bone, and it is not appropriate for all scenarios. But when used appropriately, a splint can reduce damage and discomfort while your cat awaits veterinary care.