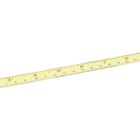
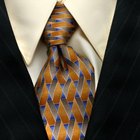
How to Make an Elizabethan Corset
Elizabethan corsets were designed to flatten the torso and, when combined with wide skirts, create the illusion of a smaller waist. A corset will ensure your period costume wows, but commercial versions can be uncomfortable, expensive and shoddily made. Making your own can not only be done for a fraction of the cost but will fit you perfectly. To make your own, choose a simple but historically accurate design that can easily be altered with the addition of tabs or straps to become an important part of your perfect outfit. Does this Spark an idea?
Things You'll Need
- Measuring tape
- Busk
- Paper
- Ruler
- Pencil
- Fabric
- Lining fabric
- Scissors
- Needle
- Thread
- Boning
- Pins
- Ribbon
- Grommets
- Grommet punch
- Lacing ribbon
Instructions
-
Creating Your Pattern
-
1
Take your measurements. You will need to measure your waist, bust and waist-to-underarm, so begin by looping the measuring tape around the narrowest part of your waist and recording the measurement. To measure your bust, loop the tape around the widest part of your chest and write down the figure. The waist-to-underarm measurement should be taken from your armpit to the narrowest part of your waist and again recorded.
-
2
Measure the length of your busk. The busk is the wider piece of boning used to make the front of the corset rigid. The length of this will be the front-center length of your corset.
-
-
3
Lay a large sheet of paper on a flat surface.
-
4
Draw a vertical line the length of your busk on the right-hand side of the paper.
-
5
Subtract 2 inches from your bust measurement and divide it in half. This is length A.
-
6
Draw a horizontal line of length A at a right angle to the end of your front-center measurement, toward the left of the paper.
-
7
Mark 2 inches to the left of the midpoint of this line.
-
8
Measure down from this mark 1 inch for an A or B cup, 2 inches for a C cup and 3 inches for a D cup or more and mark this point 1.
-
9
Using the same measurement of 1, 2 or 3 inches measure down at right angles from the end of the line opposite to the center-front and mark this point 2.
-
10
Measure along the bust line a quarter of its length out from the center-front and mark this point 3.
-
11
Draw a gently curving line between points 1, 2 and 3. Between points 2 and 1 should be a very shallow "n" shape and between points 1 and 3 should be an equally shallow "S" shape.
-
12
Measure straight down from point 1 the length of your waist-to-underarm measurement and mark this point 4.
-
13
Subtract 2 inches from your waist measurement and divide it in half. This is length B.
-
14
Draw a horizontal line of length B at a right angle to your front-center measurement, toward and encompassing point 4.
-
15
Measure down 1 inch from the end of this line and mark this point 5.
-
16
Draw a straight line between points 2 and 5 to form the center-back of your corset.
-
17
Divide the waist line into four equal parts and mark these points 6, 7 and 8, from left to right.
-
18
Join point 8 to the end of the center-front line with a shallow curve that deepens where it joins the center-front to ensure there is enough space for the busk.
-
19
Measure 1 inch up from point 7 and mark this point 9.
-
20
Join points 5, 6, 9 and 8 with a shallow curving line that encompasses them all. Cut along these lines to finish your pattern.
Sewing your corset
-
21
Fold your fabric in half with the right side in and lay it on a flat surface.
-
22
Lay your pattern on top of the fabric with the center-front line against the fold and draw around the edges with pencil or chalk.
-
23
Cut out the pattern.
-
24
Repeat steps 2 and 3 with your lining fabric and baste (sew with a loose running stitch) the two layers together.
-
25
Lay your busk in the center of the corset on the lining side and draw around the busk a small distance from its edges to form a pocket that the busk fits in to.
-
26
Lay your boning on your corset as follows:
- 1/4 inch from the center-back line
- From point 1 to point 9
- Midway between these boning lines
- From point 3 to point 8
- In the equivalent places on the opposite side
The boning can be adjusted according to personal preference, including adding more.
-
27
Draw around the boning a small distance from its edges to form pockets that the boning will fit into.
-
28
Stitch along these marks to form pockets.
-
29
Pin the wrong side of the ribbon to the right side of the corset along both the center-back edges and the bottom edge and stitch it.
-
30
Fold the ribbon over the edges and stitch to the lining to cover the raw edges and trim the ends of the ribbon.
Assembling the Corset
-
31
Slide the boning and busk into the pockets.
-
32
Stitch the ribbon to the top edge as in steps 9 and 10.
-
33
Mark eight points equidistant from each other and 1/2 inch in from the center-back on each side.
-
34
Punch the grommets into these marks by putting the grommet top and bottom on to the ends of the grommet punch and lining these ends up with the first mark. Push firmly to close the punch and insert the grommet. Repeat for the remaining marks then lace up your corset.
-
1
Tips & Warnings
It is best to use a strong fabric such as linen or silk to prevent tearing.
Decorate the corset in any way you choose -- the only limit is your imagination.
To make the corset easier to lace, twist the ends of the lacing ribbon and wrap them in thread.
References
Resources
- Photo Credit The bridesmaid helps the bride to lace up a corset image by Nadezda Kraft from Fotolia.com