Things You'll Need
Compound miter saw
Tape measure
Framing square
Power drill and 1/16-inch bit
Tack nails
Hammer
Countersink tool
Caulking gun and caulk
Rag
Baseboard putty stick, matched to the molding’s color
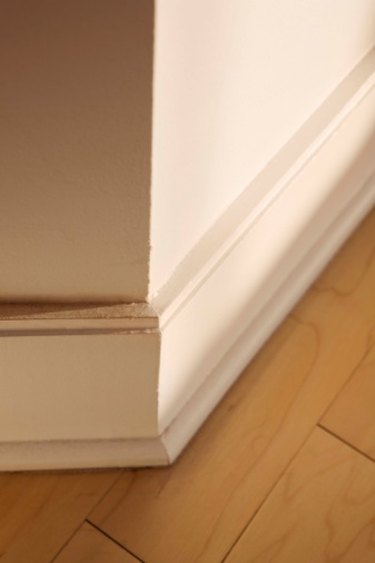
If you've recently installed new carpet in your home, you can save the cost of hiring a finish carpenter by installing the baseboard molding yourself. Baseboard molding is fitted to the bottom of a wall for decoration and to hide unsightly blemishes and carpet fray. Professional-looking baseboard installation can be achieved with a compound miter saw that can cut 45-degree corner angles at the molding ends. Two baseboard pieces, cut at matching angles, can be joined together at inside and outside corners, creating a finished, aesthetic look.
Step 1
Measure and note the length of the longest wall in the room, from corner to corner, accurate to 1/16-inch. Note whether the corners are inside or outside corners.
Video of the Day
Step 2
Set the miter saw to a 45-degree angle. If the left side of the wall is an inside corner, cut one end of a piece of molding to a 45-degree inside angle, forming one half of the inside corner. To do this, position the molding end so the miter saw will cut the molding from the inside of the molding, outward. The angled cross-section, resulting from the cut, should face outward. If the left side of the wall is an outside corner, cut one end of the molding to a 45-degree angle, forming one half of the outside corner. Position the miter saw so that the angled blade cuts from the end of the molding, inward. The angled cross-section, after the cut, should be hidden, facing the inside of the molding.
Step 3
Cut the opposite end of the molding to accommodate the orientation of the right-hand corner of the wall. If the right side of the wall is an inside corner, measure and mark the wall's measured distance along the back of the molding. Position the unfinished side of the molding under the miter saw so that the saw will make an angled cut into the molding from the end, inward. This 45-degree cut should accommodate one half of an inside corner. If the right side of the wall is an outside corner, measure and mark the wall measurement distance -- minus the thickness of the molding -- along the molding's unfinished side. This will result in a hidden, angled cut that will accommodate one half of an outside corner.
Step 4
Fit the molding to the wall, flush against the carpet. If the molding is slightly long, trim it at angled, 1/16-inch increments from the end to fit the wall. Drill 1/16-inch holes every 16 inches through the baseboard, angled downward toward the wall plate. Hammer tack nails through these holes into the wall plate. Countersink the nails by tapping them farther with a countersink tool.
Step 5
Install subsequent baseboards using this procedure. Measure the length of a wall, adjacent to the finished wall. The first cut will mirror the corner cut of the molding already installed. Determine the type of corner at the opposite end of the wall, then cut the necessary inside or outside angle. Fasten the molding with nails.
Step 6
Apply a line of caulk at the inside and outside corners to conceal gaps. Press the caulk with your finger into the gap, wiping the excess with a damp rag. Fill the nail holes in the molding with a putty stick that matches the molding's color. If your molding is white, you can also use caulk.
Tip
Cutting angles with a miter saw is difficult at first and requires practice. Practice performing angled miter cuts with scrap molding pieces prior to starting the project.
If one length of molding is too short for a wall, run multiple pieces by making 30-degree matching cuts in the ends of the connecting pieces. One end should have an outside angled cut, and one end, an inside angled cut. Fit these pieces together like a jigsaw puzzle.
If one end of a wall terminates into a baseboard heater, door frame molding or another obstruction, cut the corresponding end of the molding straight at a flat angle to the obstruction.
Video of the Day