About 80 percent of all malfunctions with a central air conditioner unit originate with electrical problems, and in a good many of these instances, it is the capacitor to blame. To have a repair-person make a service call to replace a capacitor can easily cost you $300 to $400, or more, but the part itself often costs only $10 to $20, so the advantages of replacing the part yourself are obvious. And while many air conditioner repairs should be handled only by a pro, this is one you really can do yourself.
The Function of the Capacitor
Video of the Day
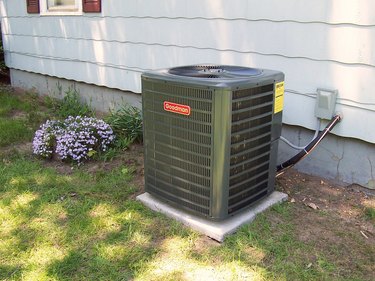
Capacitors serve different functions in different electrical appliances and devices, but in a central air conditioner, the capacitor serves as a kind of battery that stores the electrical current at a level sufficient to start the various motors in the system — the compressor, the blower motor, and the outside fan. When any motor starts up, it momentarily draws a heavy power load, and the capacitor stores up the electrical power needed to "jump-start" these motors into action.
Video of the Day
Some air conditioners have a single capacitor that operates all three motors, but other units may have separate capacitors for the compressor, the forced air blower, and the outside fan.
Symptoms of a Failing Capacitor
A capacitor can be damaged by heavy power surges, but more often they simply wear down and lose their ability to hold a charge. When a start or run capacitor begins to fail, one of the following symptoms may occur:
- As a capacitor begins to wear out, it may make an audible clicking sound within the cabinet. If you hear this, replace the capacitor immediately, as the motor itself could burn out if the capacitor fails to start the motor.
- When a capacitor dies completely, the air conditioner motor will try to come on but may make a humming sound rather than fully starting up. It is easy to hear this malfunction. Again, this is a sign that immediate replacement is needed.
- When the capacitor attached to the compressor starts to weaken, it may cause a "hard-starting" condition in which the air conditioner struggles to turn on but then shuts down again almost immediately. Replace the capacitator immediately, because this situation puts a huge strain on the compressor and other parts of the system.
Replacing a Capacitor Yourself
Replacing a capacitor isn't hard and can be done with simple tools and materials, most of which you may already have. But it's important to remember that capacitors are designed to store electrical current, and thus there is a danger of shock if you touch one or try to disconnect it without first discharging any current it is storing. This is easy to do; simply draw blade of a screwdriver across the two metal contacts to discharge. If you fail to do this, you run the danger of a nasty shock.
Step 1: Turn OFF the Power
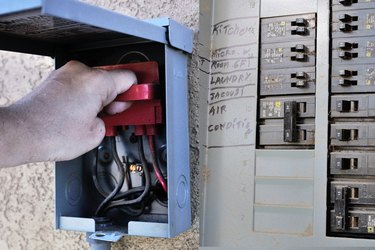
Turn off the power to the air conditioner. Usually, there will be a block fuse or local circuit breaker located in a box near the outdoor air conditioner unit — shutting off the power requires you to pull out the block fuse or shut off the circuit breaker.
If there is no outside shut-off box, then turn off the power by shutting off the circuit breaker controlling the air conditioner from the main service panel. This will be a 240-volt double-bar breaker, and it should be labeled as the air conditioner breaker. Also, turn the thermostat inside your home the OFF position. This will prevent small pulses of low-voltage current from being sent to the capacitor as you are working.
Step 2: Remove the Access Panel

Open the access panel to your air conditioner unit, using a nut driver to remove the mounting screws. Normally, this panel is located on an upper corner of the air conditioner casing. Store the cover and the screws in a safe place.
Step 3: Buy a New Capacitor
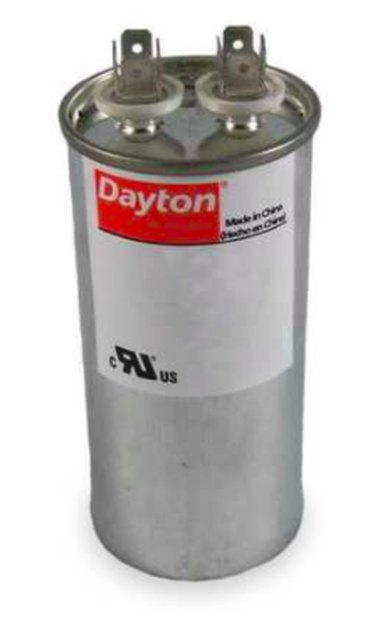
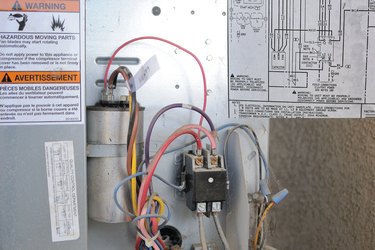
Locate the capacitor inside the panel. Usually, it is shaped like a can, with a sticker applied to the side. Note the technical information written on the sticker — the load voltage, capacitance, tolerance. Purchase a new capacitor with the same specifications. The new capacitor may be slightly different in shape, but this is not a problem provided it can still be mounted in the existing space.
Step 4: Discharge the Capacitor and Label the Wires
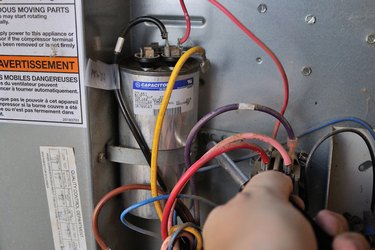
Even with the power turned off, the capacitor may be holding stored electricity, and this current must be discharged before you can work on it safely.
To discharge the capacitor, hold the blade of an insulated screwdriver across the two metal terminals that extend out from the capacitor body. This effectively "short circuits" the capacitor and discharges any electricity still stored inside.
Now, inspect the old capacitor and note where each of the three wires — fan, common and _compresso_r — is attached. The top of the old capacitor should have markings that indicate where each wire goes: "Fan" for fan, "C" for common, and "Herm" for the compressor. Place small tabs of tape on each wire, labeling it with a marker to note which terminal it was attached to. Now it is safe to detach the spade wire connectors and wires from the old capacitor. Remove the capacitor by unscrewing the mounting strap and pulling the capacitor out of the unit.
Step 5: Install a New Capacitor
Position the new capacitor in the same spot as the old one. Use a mounting strap — either the old one or a new one, if necessary — to secure it in place. Slide the ends of the spade wire connectors onto the appropriate posts on the new capacitor, making sure the connections are correct: fan wire to "Fan" post; common wire to "C" post; compressor wire to "Herm" post.
Step 6: Turn Power ON and Test

Turn on the power to the air conditioner unit by switching on the circuit breaker or reinserting the block fuse at the power box.
Turn the thermostat back to the ON position, and then set the temperature to a low setting so that the air conditioner turns on. If it does not function correctly, the most likely cause is that the wire leads on the capacitor have been attached incorrectly. Turn the power back off; discharge the capacitor, and check the wire connections again. Once you have verified that the unit is working properly, replace the access cover.