Occasionally, the cord that comes with a power tool can prove too short for your space layout and needs. Custom crafting your own 220-volt extension cord allows you more control over the end product as you can select the specific length you need. Additionally, you'll know that the cord's materials and workmanship reduce safety risks upon use of the cord. However, this project should only be undertaken if you thoroughly understand the basics of working with and modifying electrical cords. To create a dependable, safe 220-volt extension cord, start by understanding essential electricity concepts and the basic components of a custom cord.
Video of the Day
Where to Use a Custom-Made Cord
Custom extension cords, sometimes referred to as "drop cords" or "extension leads," are ideal for certain uses but ill-advised in other cases. A custom cord is suitable for use with large power tools, such as a table saw, jointer and planer.
Video of the Day
Avoid using any type of extension cord for a major 240-volt appliance that wasn't commercially manufactured for that specific use or crafted for you by a master electrician. Homemade cords aren't suitable for this purpose and pose a serious risk of property damage, electrocution and fire.
Understanding Amperage and Safety
On average, electricity kills 300 people and causes over 4,000 injuries annually in the U.S. alone. That's why it's essential to understand its key concepts before you attempt to construct any kind of custom electric extension cord.
Amperage is the measurement of the rate of flow for a current of electrons (electricity). One ampere is defined as the flow of one coulomb (or 6 x 10¹⁸ electrons) by a single point on a conductor in one second_._
Voltage is the measurement of the pressure put on free electrons causing them to flow (i.e., the electromotive force). One volt is defined as the amount of force necessary for a single ampere to travel through a specific conductor that has a resistance of a single ohm.
An ohm is the unit of resistance in any conductor of electrical current. The degree of resistance in any conductive element depends on three basic factors: size, type of material and temperature. For example, in a wire conductor the following changes will impact the resistance and thus the ohms:
- For wire conductors, resistance will increase when the diameter of the wire decreases or the length of the wire increases.
- Resistance will also increase when the material is less conductive.
- Finally, a decrease in temperature decreases resistance.
Components of an Extension Cord
Every extension cord contains common components. The specific types of each of these components will determine where and for what tools that cord can be appropriately and safely used. From the inside out, these components are wires of specific gauges, insulation, wire sheathing and a plug.
Conducting wires are the essential component of any electrical extension cord. Generally speaking, the longer the cord, the less current it can handle.
Wire gauge, or thickness, also impacts the amount of current the wire can safely carry. Generally, a larger wire gauge (i.e., a thinner wire) is suitable for smaller currents. The gauge of the wire will be marked on the wire sheathing.
Insulation surrounds the conductive wires of an extension cord. Indoor cords may or may not have insulation. In cords with polarized plugs, the return wire can be identified by its sheathing, which will either be ribbed or marked with a white line.
Different types of wire sheathing are appropriate for indoor versus outdoor extension cords. Indoor cords will have plastic sheathing. These are usually white or brown in color.
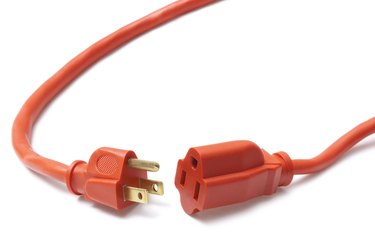
Finally, plugs themselves have three components: the prongs, a casing and terminals for the wires. Polarized cords feature prongs of different sizes. The larger prong indicates the return wire connection. These cords are only suitable for polarized outlets. Plugs with three prongs are suitable for three-wire cords, with the third prong connected to the grounding wire.
Instructions for Custom Length 220-Volt Extension Cord
Begin by carefully measuring how long your cord needs to be. Also, establish how much current the cord will need to carry and what kind of connectors it will require at each end.
Next, you'll need to get a piece of cable long enough for your needs that also conforms to regulations, as well as Consumer Product Safety Commission safety guidelines for extension cords. A 12-gauge cord up to 100 feet long will be good for a current up to 15 amps and can safely handle any power tool.
Slide the new female and male plugs onto the cord so that about 5 or 6 inches of the cord passes through the new plug's housings. You'll need to distribute enough cord length through the plugs to allow you to hold it safely while you work on the inner three wires.
For each plug, strip off approximately 2 inches of the outer insulating sleeve without damaging the wire's insulation. Cut each wire to the length required to reach the plug terminals.
Using wire strippers, bare the ends of the wires leaving a quarter inch of exposed metal on all three. Carefully insert the bare wires into the terminals. Connect the grounding wire to the green terminal, the hot wire (black) to the brass terminal and the "neutral" wire (white) to the silver terminal. Tighten each terminal screw firmly without stripping them, then trim any excess wire.
Double-check to ensure the wires are appropriately connected to the correct terminals, then attach the cord clamp where the full insulating cover remains. Visually inspect the wires to make sure they aren't kinked or trapped, then assemble the plug housing.
Before using your cord, use a multimeter to ensure continuity of the current. Attach the multimeter's probes to the hot prongs of the plugs. Repeat between the two neutral prongs and then the two grounding prongs. If all three tests show the wires are correctly connected, the extension cord is ready for use.