Things You'll Need
Replacement pipe
Pipe cutters or other pipe tools
Shovel or back hoe
Sewer pipes are a vital part of a home waste water system. Incorrectly installed pipes can allow household waste and sewage to leach into your lawn or even under your house, creating a health hazard. Traditional sewer repairs involved digging up the pipe, repairing it and back filling over the repaired section of pipe. In some instances, modern repair methods avoid the tedious process of digging up the pipe to check for leaks.
Step 1
Examine your plumbing situation to see if a broken sewer line is the probable cause. Signs of a broken line include, but are not limited to, over-flowing toilets, an extra green patch on the lawn and gassy or mildew odors inside the house. Check around your home while a large appliance that uses water is draining. If you see water bubbling up outside while the washing machine is emptying out, that is an excellent indicator that you have a broken sewer line.
Video of the Day
Step 2
Determine the type of pipe that may have been damaged. Sewer pipes may be made of iron, clay tile or heavy-duty PVC material. Each material has different properties and may present different repair problems.
Step 3
Assess the probable location and options for repair. Find out what the regulations are for waste water systems in your area. If you live in a rural area and installed your own plumbing, you may be able to dig up the problem area and deal with it yourself. If you live in a suburban or urban area or in a water protection location you will probably need to call in a plumber.
Step 4
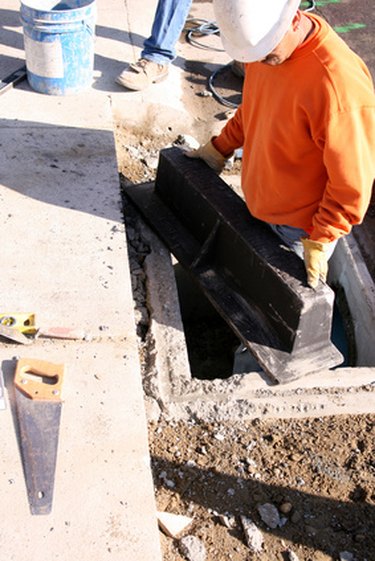
Dig up the pipe in the problem area, if you have decided to make the repair yourself. Dig away from the break on both ends, making sure you have located the entire problem. Measure the length of the broken pipe, and then purchase replacement pipe of the same type. Lay out the pipe beside the trench you have dug.
Step 5
Make sure that no household appliances are dumping water through the pipe while you are working on it. Remove the broken pieces, back to a point where the original pipe is whole. As you are doing this, make note of the direction in which the male and female ends of the existing pipe are pointed.
Step 6
Clean the exposed end of the sound part of the existing pipe. Wipe the end of the new pipe as well to remove dust or anything else that would prevent a good bond between the pipes. Smear the inside of the female end of the pipe and the exterior of the male pipe with the glue compound recommended for your particular kind of pipe, and then fit them together. Continue this along the length of the break, using extra care in fitting the last piece of pipe.
Step 7
Let the entire assembly dry, and then run water through the pipe to make sure that you do not have any leaks in the joins of the new pipe.
Step 8
Make a list of local plumbers and investigate their credentials and prices should you need a plumber to do the repair. Once you have hired a plumber, observe him while he is working. You may want to know later what he did and how he did it. One technique professionals are now using is to determine the problem area, and then dig an access hole at each end of it. They will then use a hydraulic machine to pull replacement pipe through the space where the old pipe was located, breaking it up as it goes along.
Step 9
Keep records of when the pipe was replaced, where the repair was located and the date of the event. This will help you if you have future problems, or if you decide to sell your house.
Video of the Day