Home Sweet Home
Hacks, Tips & Tricks
Squeaky Clean
DIY Decor
Carpentry & Remodeling
Maintenance & Repair
Green Thumb
All Home Sweet Home
Chow Down
Main Dishes
Sweet Treats
Snacks
Copycat Recipes
Drinks & Cocktails
Sides & Appetizers
Veggie Faves
Food Hacks
All Chow Down
Get Crafty
Sew Simple
Fun Crafts
Art Projects
All Get Crafty
Let’s Celebrate
Valentine's Day
St. Patrick's Day
Easter
Mother's Day
Father's Day
4th of July
Back to School
Halloween
Thanksgiving
Christmas
New Year
Weddings
Baby Showers
Birthdays
Parties & Events
Gifts
All Let’s Celebrate
JOIN OUR NEWSLETTER
JOIN OUR NEWSLETTER
Home
Chow Down
Chow Down
By
Beth Huntington
Homemade Fresh Lemon Ice Cream
Chow Down
By
Sharon Hsu
Fancy Chocolate-Covered Oreos
Chow Down
By
Sharon Hsu
Daisy Meringue Cookie Pops
Chow Down
By
Kirsten Nunez
Baking for One — Oatmeal Cookie
Chow Down
By
Kirsten Nunez
Vegetarian Guinness Stew
Chow Down
By
Bianca Fernandez
Cream Cheese and Fruit Pastries
Chow Down
By
Kirsten Nunez
Baking for One — Brownie in a Mug
Chow Down
By
Kirsten Nunez
Cottage Pie
Chow Down
By
Bianca Fernandez
Sourdough Discard Waffles and Pancakes
Chow Down
By
Sharon
Dipped Marshmallow Pops
Chow Down
By
Bianca Fernandez
Cinnamon Roll Cookies
Chow Down
By
Kirsten Nunez
3 Pudding Cups With Girl Scout Cookie Crusts
Chow Down
By
Beth Huntington
Pistachio Bread
Chow Down
By
Sharon
Lucky Charms Cereal Treats
Chow Down
By
Sharon
Shamrock Shake Pie
Chow Down
By
Kirsten Nunez
How to Make Ramen Better: 3 Easy Ramen Noodle Meals
Chow Down
By
Kirsten Nunez
Chickpea Snack Mix
Chow Down
By
Kirsten Nunez
Hawaiian Meatballs — '70s Party Classic
Chow Down
By
Kirsten Nunez
Roasted Grape and Mascarpone Toasts
Chow Down
By
Sharon
Heart-Filled Chocolate Cupcakes
Chow Down
By
Bianca Fernandez
Chocolate Snickerdoodles
Chow Down
By
Bianca Fernandez
Easy Sugar Cookie Bars
Chow Down
By
Damarys Ocaña Perez
Kalejunkie: The Power of a Good Meal
Chow Down
By
Bianca Fernandez
Dazzling New Year's Sugar Cookies
Chow Down
By
Sophie Katzman
A Cute & Colorful Alphabet Cake for All Ages
Chow Down
By
Bianca Fernandez
Peppermint Meringue Swirls Are a Dreamy Winter Treat
Chow Down
By
Beth Huntington
A Taylor Swift Gingerbread House Inspired by the "Folklore" Cabin
Chow Down
By
Bianca Fernandez
A Mini Holiday Village Made With Graham Crackers
Chow Down
By
Sophie Boudreau
11 Hanukkah Dessert Ideas, From Olive Oil Cookies to Sweet Latkes
Chow Down
By
Kirsten Nunez
Edible Centerpiece Made of Cranberry-Orange Monkey Bread
Chow Down
By
Fred Decker
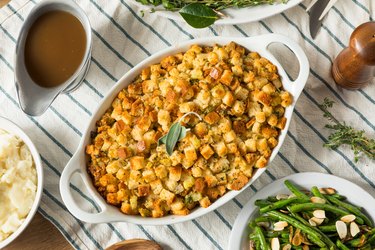
Secrets to Spectacular Thanksgiving Stuffing
Chow Down
By
Kirsten Nunez
Ice Cream "Turkey Legs" Are the Sweetest Optical Illusion
Chow Down
By
Fred Decker
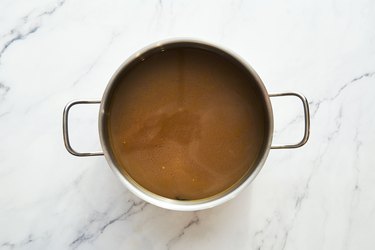
Good Gravy! A Beginner-Friendly Guide to Homemade Gravy
Chow Down
By
Fred Decker
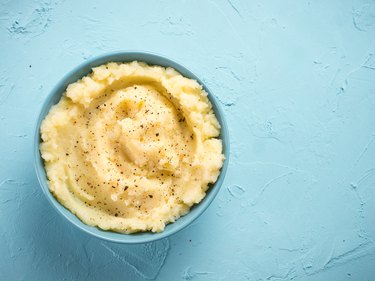
Better Mashed Potatoes: A Mini Guide
Chow Down
By
Bianca Fernandez
Butterfly Pea Pudding with a Natural Blue Hue
Chow Down
By
Bianca Fernandez
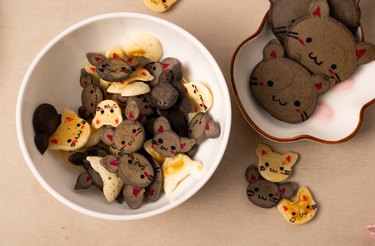
Mini Cat Pancakes for a Purr-fect Breakfast Bite
Chow Down
1
2
3
4
5
>
Report an Issue
Contact*:
Severity*:
High
Normal
Low
Description*:
Screenshot loading...
Cancel
Submit