Things You'll Need
Chocolate chips or coins
Pot of water
Stainless steel bowl
Rubber spatula
Candy thermometer
Towel
Nonporous surface or slab
Pastry scraper
Chocolate molds
Decorative chocolates make excellent gifts for friends and family. But there's no need to buy them from a store. You can make them in your own home by pouring chocolate into molds of different shapes and designs. Often, novice candy makers fail to prepare the chocolate properly. This results in dull or streaked candies. Tempering is a process in which the chocolate crystals are evenly distributed throughout the candy, which results in shiny and smooth confections. Follow these steps to produce attractive shiny chocolate molds.
Step 1
Put the pot of water on the stove and bring to a boil.
Video of the Day
Step 2
Ensure the stainless steel bowl is completely dry and add the chocolate pieces to it. Chocolate chips or coins are recommended as they melt evenly. If using a chocolate bar, cut it into pieces no larger than 1/2 inch square.
Step 3
Place the stainless steel bowl over the pot of boiling water and stir with the spatula until the chocolate is smooth. You can leave the water simmering gently or turn off the heat completely. Do not let moisture form on the stainless steel bowl.
Step 4
Place a thermometer into the melted chocolate and allow it to reach between 110 to 120 degrees Fahrenheit. Refer to your chocolate's manufacturer for specific melting and tempering temperatures. If no information is available, heat the chocolate to 110 degrees.
Step 5
Remove the stainless steel bowl from the pot of water and dry the bottom with a towel. Allow the chocolate to cool slightly.
Step 6
Spread 1/3 of the melted chocolate on the nonporous surface with the spatula and gather the chocolate together into a pile using a pastry scraper. Many candy makers use a marble or granite slab.
Step 7
Continue to spread and bring together the melted chocolate until it thickens and cools to 82 to 85 degrees.
Step 8
Add some of the melted chocolate in the stainless steel bowl to the cooled chocolate and stir gently with the spatula.
Step 9
Collect the chocolate on the marble slab and add back to the stainless steel bowl. Stir it gently, careful not to create bubbles. Steps 6 to 9 are crucial to distribute the chocolate crystals evenly, ensuring a shiny, finished result.
Step 10
Measure the temperature of the chocolate. If it is 90 to 92 degrees, the chocolate is tempered and ready to pour into the molds. If not, repeat steps 6 to 9 until it reaches the desired temperature.
Step 11
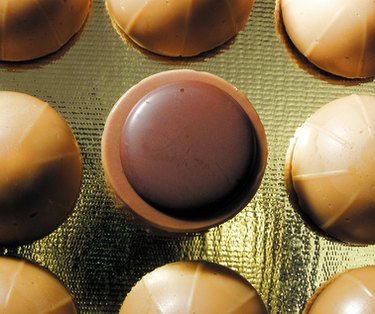
Pour the tempered chocolate into clean dry molds and let them cool. The chocolate will harden into smooth, firm and shiny molds.
Tip
Different types of chocolate may have varied temperatures for melting and tempering. Check with the brand for recommendations.
Store the chocolate in an airtight container in a dry cool spot.
Warning
It is important to keep the chocolate as dry as possible. Even a drop of water can cause the chocolate to curdle.
Use protective gloves or mitts when handling the stainless steel bowl as it will be very warm.
Take care when handling the melted chocolate as it will be molten hot.
Be sure to clean up chocolate spills and splatters as soon as possible to avoid staining your kitchen surfaces.
Video of the Day