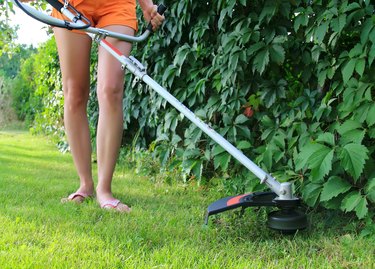
Stihl is best known for its chainsaws, but the company also manufactures string trimmers, and they're among the best on the market. As far as the engine is concerned, gas-powered Stihl trimmers operate on the same principle as chainsaws, the only difference being the connection to the cutting apparatus. If you can adjust a chainsaw carburetor, you can adjust a Stihl string trimmer carburetor, because the procedure is almost exactly the same.
Stihl trimmer carburetors are preset at the factory, but it's common for them to fall out of adjustment after heavy use. When the carburetor isn't adjusted properly, the engine may smoke, due to fuel/air mixture that's too rich, or it may race or stall, which is usually because of a lean mixture. You adjust the fuel/air mixture using three screws located on the side of the carburetor right between the air filter and the fuel tank. If you have a newer model, you'll need a special tool to turn these screws.
Video of the Day
Video of the Day
High, Low and Idle Screws
The three adjustment screws are labeled H for high, L for low and LA for idle. The L screw controls the fuel mixture when the trimmer is operating at low speed, and on a chainsaw, it's usually the first one you adjust, although following an adjustment sequence isn't as important for a string trimmer. The H screw controls the mixture when the trimmer is operating at full throttle, and the LA screw adjusts the idle mixture.
Things You'll Need
How to Adjust a Stihl Trimmer Carburetor
Step 1: Remove the String Spool
Set the trimmer on a flat surface with the trimmer head hanging over the edge so it can spin. For safety, it's a good idea to remove the string spool before you start so no one gets hurt. You do this by holding down the tabs on the spool cover, lifting off the cover and then lifting off the spool.
Step 2: Clean or Replace the Air Filter
Remove the air filter cover and pull out the air filter. If it's dirty, clean or replace it, because a dirty filter prevents proper carburetor adjustment. You can leave the filter out while doing the adjustment, but if it's clean, you can also put it back and replace the cover.
Step 3: Remove the Screw Guards
Stihl supplies rubber guards on the carburetor screws, and you have to remove them before you can adjust the screws. You can usually pull them off with pliers or pry them off with a flathead screwdriver.
Step 4: Adjust the High-Speed Screw
Start the trimmer and hold the throttle trigger in all the way to get the trimmer head spinning at maximum speed. Turn the H screw clockwise with a carburetor adjustment tool until the head is spinning as fast as it will go, then back off the screw carefully until the RPMs start to decrease. Turn the screw slowly clockwise again until the engine once again just starts to pick up speed. This is the sweet spot for the H screw — a little on the rich side.
Step 5: Make a Preliminary LA Screw Adjustment
Release the throttle and let the trimmer idle. If it stalls, turn the LA screw clockwise until the engine keeps running when the throttle isn't engaged. The trimmer head may be spinning, but you'll correct that after adjusting the L screw.
Step 6: Set the L Screw
With the engine idling, turn the L screw clockwise until the engine speed just starts to increase, then back it off slowly until you hear the speed just starting to decrease. Leave the screw in this position, because you don't want a rich mixture at low speed.
Step 7: Set the Final Idle Speed
Turn the LA screw clockwise until the trimmer head just starts to spin, then back off the screw slowly. The point at which the head stops spinning is the optimum position for the idle screw.