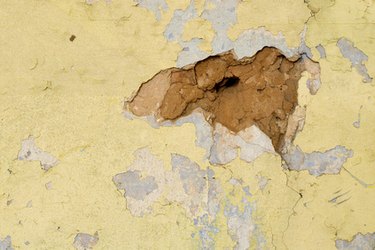
Plaster walls with lead-based paint are common in older homes. Sheetrock did not replace the commonly used lath and plaster for building interior walls until after World War II. Lead-based paint, which was banned in 1978, becomes hazardous when the dust is inhaled or when paint chips are eaten by young children. Removing a lath and plaster wall creates considerable dust, which means great care must be taken to contain the dust and protect workers and others from inhaling it. Short-term health effects of lead poisoning include vomiting, convulsions, coma and death. Long-term effects include brain and tissue damage, especially in infants and young children.
Prepare the Work Area
Video of the Day
Step 1
Remove furniture, area rugs, draperies and other items, then cover the floor, counters and appliances with thick plastic sheeting. Sheeting can be fixed with duct tape for a tight seal so it does not come off.
Video of the Day
Step 2
Turn off heating and air conditioning systems, then tape plastic sheeting tightly over vents. This prevents plaster dust from being drawn into the heating system and transported to other rooms.
Step 3
Put on protective clothing. Workers tearing down a plaster wall with lead-based paint must wear respirators with High Efficiency Particulate Absorbing (HEPA) filters to keep from inhaling the contaminated plaster dust. These filters block smaller particles like plaster dust that are not blocked by regular face masks. Workers also should wear goggles, work gloves, shoe covers and clothing that keeps the dust off their skins. Protective clothing means long pants and long-sleeved shirts to protect as much skin as possible.
Step 4
Use a hammer to knock a hole in the wall, then tear away strips of plaster with a pry bar or by hand. Plaster breaks easily when hit with a hammer and can be removed in large chunks. Wetting the plaster with a spray bottle helps reduce dust.
Step 5
Pry lath from the wall and remove nails. Lath is made of thin strips of wood that are used to hold up the plaster. Before plastering a wall, lath is nailed to the studs. Prying the lath from the wall also can remove chunks of plaster that are attached to it.
Step 6
Pick up the plaster chunks and lath, then place them into plastic bags set inside cardboard boxes. After filling each bag, seal it as tightly as possible to prevent dust from escaping. Plaster chunks are heavy and the cardboard boxes can provide support for the bags and prevent them from ripping open.
Step 7
Vacuum the work area and workers' clothing with a vaccuum cleaner equipped with HEPA filters. These specialty vacuum cleaners can be bought at laboratory supply stores or rented at equipment rental stores.
Step 8
Roll up and dispose of the plastic sheeting. Begin rolling carefully from the ends toward the center so that the dust is contained as much as possible inside the sheeting.
Step 9
Change clothes in the work area. Place workers' clothing in a plastic bag and wash it separately from the household laundry. Despite careful cleaning of the work area, workers can still carry fine particles of lead-contaminated plaster dust on their clothing.