Craftsman lightweight electric lawn trimmers use a spool of nylon line to perform the cutting. As you use the trimmer and the line wears away, the trimmer feeds more line out so you can continue to work. Eventually you will run out of cutting line and need to replace it. You can either purchase a new spool with the line already attached or you can add more line to the existing spool.
1. Turn the trimmer off
Video of the Day
Turn the trimmer off and unplug it.
Video of the Day
2. Place the trimmer on the ground
Place the trimmer on the ground or on a table so you can access the bottom of the trimmer head.
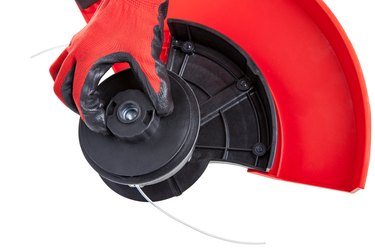
3. Depress the tabs on the sides of the cassette
Depress the tabs on the sides of the cassette that contains the spool and remove it from the trimmer.
4. Pull the spool out of the cassette
Pull the spool out of the cassette and remove any remaining line from it. Remove any dirt or debris inside the cassette.
5. Insert approximately 3/4 inch of line into one of the anchor slots
Insert approximately 3/4 inch of line into one of the anchor slots on the spool. Start in the center of the spool and wind the line around the spool in the direction indicated by the arrows on the spool. Make sure that you wind the line neatly, with the turns aligned side-by-side and tight. When the line reaches the outer edge of the spool, cut it, leaving approximately 1 ft. of line unwound.
6. Anchor the end of the line
Anchor the end of the line in one of the anchor slots on the rim of the spool.
7. Repeat Steps 4 and 5
Repeat Steps 4 and 5 to install line on the other half of the spool. Anchor this piece of line to the anchor slot opposite the first piece.
8. Place the newly wound spool onto the spindle
Place the newly wound spool onto the spindle in the cassette and rotate it slightly to ensure that it seats properly.
9. Remove one end of the line
Remove one end of the line from the anchor slot and thread it through one of the eyelets on the cassette. Repeat with the other end of the line, inserting it into the opposite eyelet.
10. Place the cassette back onto the housing
Place the cassette back onto the housing by aligning the tabs on the cassette with the slots on the trimmer head housing. You should hear a click when you press the cassette onto the housing, indicating that the cassette locked into place.
11. Trim the ends of the line
Trim the ends of the line so that approximately 5 inches remain on each.
Tips
A heavy-duty replacement spool is available that allows you to use thicker line, which lasts longer.