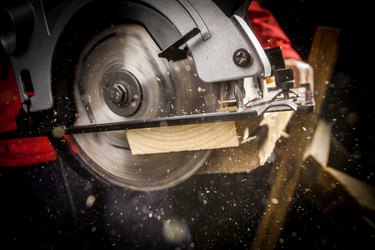
Arguably the most popular and versatile power saw there is, part of the circular saw's attraction is how easily its blades can be changed out, making maintenance a cinch for its users. A sharp saw blade makes cutting projects a breeze, but eventually all blades grow dull. When this happens, cutting will slow, and you might see burn marks or hear a straining motor. Over time, this strain can cause your motor to overwork, shortening its life. Luckily, changing the blade out takes just a few minutes and has a big pay-off in performance.
Video of the Day
Get the Right Blade
Circular saws come in a variety of sizes and types. There are rip-cut, cross-cut, combination, framing and so many other kinds of blades, so make sure you get one suited for your needs. Size also matters so check your current blade, as that's the size you need. Generally, the size is printed on the blade, where you'll see if it says it's a 10-inch or 7 ¼-inch blade and so on.
Video of the Day
Something else to look for when getting your blade is that it has an arrow for which way the blade should be installed. This is handy, since installing the blade the wrong way can be dangerous.
Safety First
Before switching out the blade, remove the battery pack or unplug the unit so you won't accidentally power up during this task.
Getting Started
The majority of saws have an Allen-type wrench of some kind incorporated on the body. This is meant for removing the blade or making other adjustments. Find this wrench.
If, for some unusual reason, the replacement saw blade you've purchased has no directional markers to make installing it simple, make note of the direction the teeth are facing on the saw now. This will help you put the new one on properly. The teeth should face forward.
Find the arbor-lock or brake button. This is often at the top of the saw, but check your user's manual if you're not sure. Engage the lock. Spin the blade to ensure it's locked so it's in a fixed position before you continue.
Removing the Blade
With the blade locked, use the wrench to loosen and remove the arbor nut or screw. To loosen it, you'll turn the direction the blade's teeth face. Once removed, set it aside.
Pull back on the retractable guard to expose the whole blade. Remove the blade. A small vibration collar should come off, too. Don't lose this. Set it aside.
Installing the New Blade
Simply lay the blade over the spindle with the teeth or arrow pointed forward. Put the vibration collar back in place, and tighten the screw or nut by hand. Return the guard to operating position.
Now, release the brake or arbor-lock and ensure the blade's lose and ready to spin. Using the wrench, finish tightening the locking screw. Make it snug but not too tight so it's able to be removed next time.
With a sharp blade on your circular saw, projects will be easier to complete, and you'll be able to keep the saw motor running well. Now that you know how simple it is to switch out, it might be time to explore the wide range of project possibilities and the special blades available for your circular saw.