Things You'll Need
Angle finder
Circular saw
Tape measure
1-by-6-inch lumber
1-by-2-inch lumber
1-by-4-inch lumber
Pin nail gun
1/4-inch plywood
Screen molding
Pneumatic staple gun
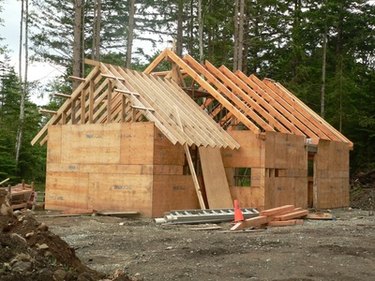
Rafter tails can be cut in a number of ways. One of the most common finishes is to install a vertical band of wood along the ends of the rafters, known as fascia. Underneath the rafters, a horizontal sheet of plywood paneling runs from the back of the fascia board to the face of the house wall, called a soffit. Its position under the open ends of the rafters makes it a good place to position vents to allow air to circulate under your roof. All of this starts with the right cut on the end of your rafters.
Step 1
Use an angle finder to discover the angle of the roof peak. Place the finder with one leg against the face of the inside of the roof peak and the other leg on the opposite face. Slide the finder up until the center rests against the bottom of the roof peak, with the two legs pressed out on the opposite faces. Read the angle from the indicator in the center of the finder. Divide this by 2 to get the angle of your rafter tails.
Video of the Day
Step 2
Use a rafter square to mark the end of each rafter with the angle taken from the peak of the roof, starting from the bottom corner of the rafter tail. Cut along this angle to create a vertical face on the end of the rafter.
Step 3
Measure the edge of the roof. Cut 1-by-6-inch lumber to fit along the ends of the rafters from one end of the roof to the other. Cut pieces so that the end joints between pieces fall in the center of a rafter tail. Nail these pieces starting at one end of the roof, butting each piece flush to the one before. Use two nails in the end of each rafter. Cut the last piece to fit with its end flush with the outside face of the last rafter.
Step 4
Cut 1-by-2-inch lumber to fit behind this fascia board. Nail it in place, with one narrow edge pressed against the back face of the fascia, and the top corner of that edge resting against the bottom of the rafter behind the fascia. Nail through the fascia into the edge of the 1-by-2s with a pin nail gun and 1 1/2-inch nails, one nail every 6 inches. Use a level to mark a position on the wall across from the rafter tails, against the inside face of the gable, at the same height as the bottom edge of the 1-by-2. Repeat this at the opposite end of the wall.
Step 5
Use a chalk line to mark a line between the two points on the wall. Cut enough 1-by-4-inch lumber to fit from one end of the wall to the other. Nail the 1-by-4 with its bottom edge along the chalk line from one end of the wall to the other.
Step 6
Make plywood soffits. Cut 1/4-inch plywood panels to fill the area from the back of the fascia below the 1-by-2 to the wall. Staple these plywood soffit panels to the bottom face of the 1-by-2 and the bottom edge of the 1-by-4 on the wall. Cut 1/4-inch-thick screen molding to fit along both edges and the ends of your soffit. Staple the molding to the bottom face of the soffit, covering the seam between the fascia on one side, the wall on the other and the back of the gable at both ends.
Video of the Day