Things You'll Need
Paper
Pencil
Eraser
Model

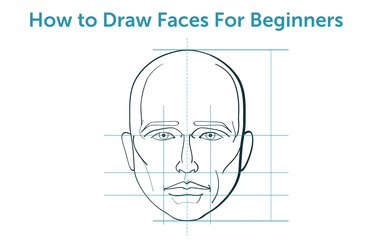
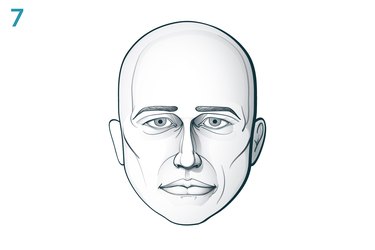
Drawing a face has many variables, but there is a way to simplify it and get the basics set up so details can be added. Like any object, it can be dissected into shapes and sizes so it can look accurate and well-proportioned.
Step 1
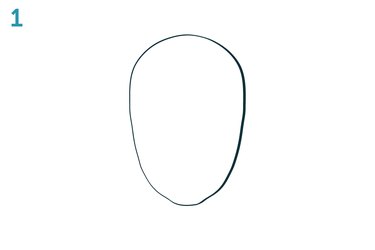
Draw out an oval with the larger end at the top.
Video of the Day
Step 2
Section the oval out by drawing horizontal and vertical lines down the middle. Divide the bottom half into halves again, and yet again. Also divide the the vertical sections into halves again. These will set up where each feature will be located.
Step 3
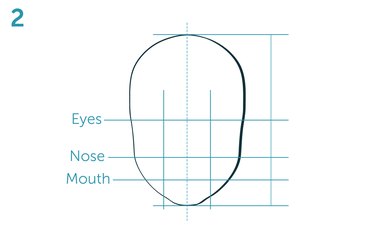
Check the measurements by the eye measurement. The face should be five eyes wide and the height should be seven eyes long. Some faces may vary by a half of an eye.
Step 4
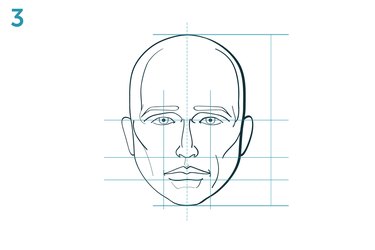
Once the places have been set for the features, focus on one feature at a time. Once the eyes, nose and mouth have been set, then hair, ears and shading can be added.
Step 5
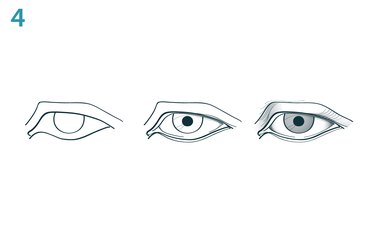
Draw the eyes almond-shaped, and made of several sections. Eyes are recessed into the head and have eyelids, eyelashes, the black pupil and the colored iris. Practice drawing the eye and each part of it.
Step 6
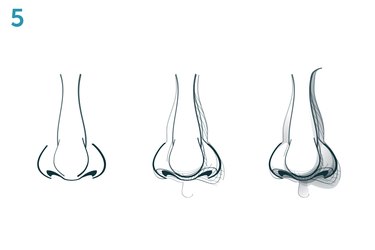
Create the nose using a simple set of lines and using shading to define its structure. The bottom of the nose should be shaded darker, as should the sides of the nose. Each nostril should be inset and darker. Look at different models to see how much the nose can differ from person to person.
Step 7
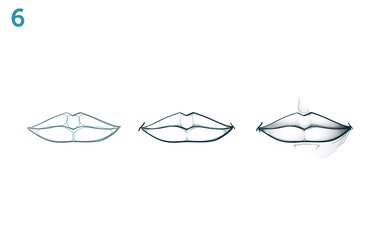
Start the lips with an outline, which will be similar to a heart with extensions on the side for the corners of the mouth. The inner line is deep and shaded darker. Practice drawing the lips and looking at models and drawing their lips.
Step 8
Add the ears from just under the top of the eye down to the end of the nose. These can be very simple, often just an open oval with a smaller oval inside. The shading is what will set the depth within the ear.
Step 9
Add hair, which can vary from person to person. Look at different models of people. Remember hair has shadows and highlights just like all the other parts of the face.
Video of the Day