No elf costume would be complete without those distinctive pointy ears. If you walk into any costume shop, you can buy latex elf ear tips, but these are generic and are often don't look real. However, with supplies from that same costume shop, you can create custom elf ears that are designed specifically for the person wearing them. They are easy to make and look much more real than something out of a package.
Cut the Plastic Wrap
Video of the Day
Cut a hole in a piece of plastic wrap the size of a quarter.
Video of the Day
Pull the Model's Ear Through the Hole
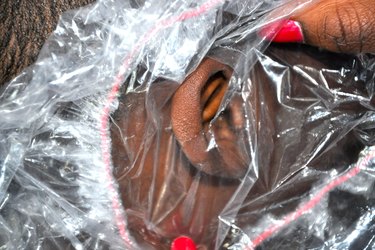
Put the plastic wrap on the side of your model's head, pulling her ear through the hole. The plastic wrap will protect her hair.
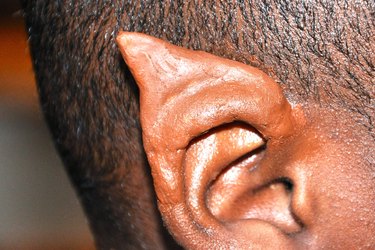
Mold the Putty Into an Elf Ear
Make sure your model's real ears are very clean and quite dry.
Sculpt an ear tip onto her ear with nose putty. You don't need any tools; just use your fingers. Coat your fingers with a little baby oil to keep the putty from sticking. Try to follow the curves of her own ear to make the tip look like it is part of the ear and not just stuck on top.
Smooth the putty's edges into her skin with more baby oil and buff out any noticeable imperfections. Be sure to smooth the putty on the back of her ear as well as the front.
Blot Up the Oil
Gently blot the tip with a tissue to remove excess oil.
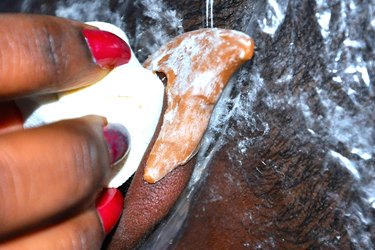
Add the Latex to the Elf Ear Tip
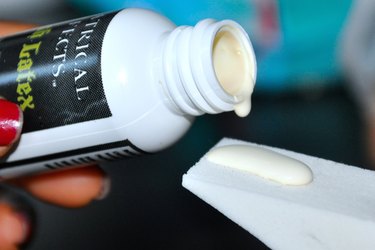
Dab liquid latex onto the DIY elf ear tip with a makeup sponge, extending it onto the front and back of the model's actual ear. Allow the latex to dry, then add another layer. You want six to eight layers total, each one stopping a little higher than the previous so that the edge stays thin.
Powder the Latex
Powder the latex elf ear with baby powder to prevent it from sticking to itself.
Peel and Powder
Carefully peel off the latex ear tip, powdering the inside as you go.
Remove the Putty
Remove the putty from the inside of the latex ear tip.
Repeat to Make a Pair of Elf Ears
Repeat the entire process for the other elf ear. If you feel comfortable, you can do both ears at once to save time.
Tip
Glue the latex elf ears back on with more liquid latex or spirit gum. If there are noticeable edges, use a cotton swab to dab a bit of liquid latex over them.
Since the nose putty will only be on your model's ears for a short time, there is no need to glue it in place any longer than necessary.
Make your new DIY elf ears your own! Paint the ears and pierce them, add plenty of blingy earrings if you wish.
Warning
Because many individuals are either allergic or hypersensitive to latex, consider wearing non-latex gloves while handling the materials listed here.
Some people may have sensitivities to some of the other makeup products, as well.