The little fan nestled in the ceiling of the bathroom often gets overlooked. However, it does require attention if it is clogged with lint and dust or has stopped working altogether. If you've never done it before, the prospect of removing the small vented cover from the exhaust fan may be perplexing. However, depending on the type of unit you have, safely removing this cover is a breeze.
It helps to know the type of mounting style of the cover you have before attempting to remove it so that you don't inadvertently damage it during the removal process.
Video of the Day
Video of the Day
Safety Measures and Tools
Before you begin to work on the ceiling exhaust fan in the bathroom, turn off the fan at the circuit breaker. Whenever working with electrical fixtures, it's best to have the power flowing to the unit completely turned off to avoid electrocution.
Depending on the fan unit, a flat-head screwdriver, Phillips screwdriver or power drill with a screwdriver attachment should be enough to remove the cover. Use a stepladder so that you can comfortably reach the exhaust fan cover.
For protection, a good pair of work gloves will protect your hands from scrapes and also help you grip the cover. Safety glasses can prevent dust from falling into your eyes and a good particle mask will ensure you don't get debris from the drywall behind the cover into your mouth and the fine particles in the ceiling don't irritate your nasal passages.
Remove the Exhaust Fan Cover
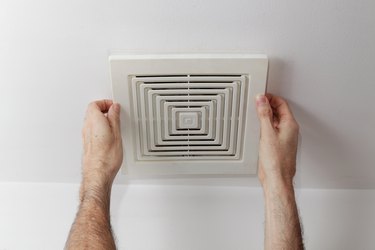
There are three mounting styles of bathroom exhaust fans — ceiling mounts, ceiling/wall-mounted and wall-mounted. Some fan designs may have clips on the sides. Wiggle the cover slightly to find the clips if you don't see any screws holding it in place. Once you locate the clips, gently pinch them to release the cover from the fan unit.
If there are no clips, inspect the fan cover for screws and remove those. These can be rather small and hidden on the side. Keep a hand on the cover so it doesn't tumble to the ground as the screws are removed. Pull down on the cover at the edges. Look for metal mounting wires on the sides of the fan cover. Gently squeeze the thin metal wires and slide them out of the slots in the ceiling.
Clean the Exhaust Fan
As long as you have the exhaust cover removed, give it a good cleaning. This will improve its function and extend its service. Have a utility bucket deep enough to soak the exhaust fan cover, dish soap, a long-handled scrub brush and clean towels ready to receive the fan cover once it's free from its casings. Put a towel or sheet on the floor beneath the exhaust fan to catch dust and debris that may fall from the ceiling as you work.
Once the exhaust fan cover is free from the unit, plop it in a warm bucket of soapy water. While it is soaking, use a handheld vacuum to remove dust from the ceiling's edges and the exhaust fan. Gently clean the exhaust fan cover's vents and corners with the long-handled brush, making sure to get into all the nooks and crannies. Thoroughly dry the fan before returning it to the exhaust fan unit.