eHow may earn compensation through affiliate links in this article.
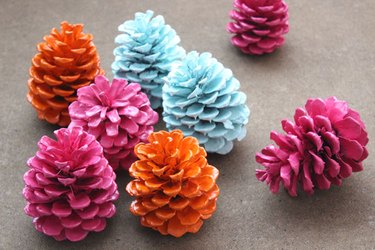
Decorating with pine cones isn't only for the winter holidays anymore. Customize them for different seasons and occasions with colorful paint, and you can use them to spruce up your home décor throughout the year. You can go vibrant for spring, patriotic for summer, and even earth and jewel tones for autumn. All it takes is a little prep work on the pine cone to make sure you get the best painting results.
Video of the Day
Video of the Day
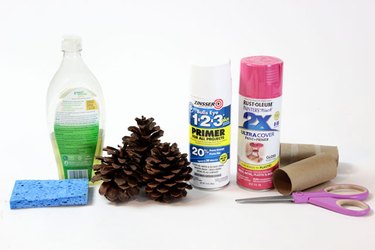
Things You'll Need
Mild soap
Sponge or brush
Toilet paper tubes
Scissors
Spray paint
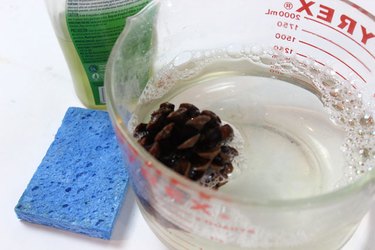
Step 1: Clean the Pine Cones
Prepackaged pine cones from the crafts store are usually already cleaned for you, but if you are gathering fallen pine cones from your yard or the neighborhood, wash them first to remove dirt and bugs. Immerse them in mild soapy water, and scrub them clean with a sponge or brush. Rinse thoroughly, and let the pine cones dry overnight. You can also speed up the drying by warming them in your oven at its lowest temperature for about an hour.
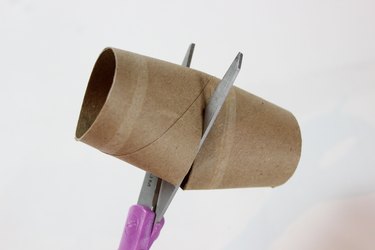
Step 2: Cut Toilet Paper Tubes
The pine cones will be easier to paint if they can sit upright rather than laying on their side. Create holders for them by cutting toilet paper tubes in half with scissors. Small bathroom paper cups also work well.
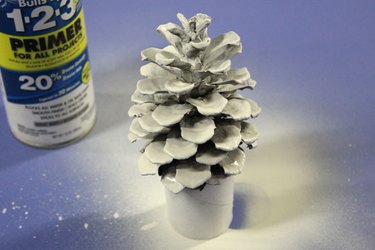
Step 3: Apply Primer
Because pine cones are so porous, they do not hold paint color well, as they tend to absorb the paint. But by first applying primer to the pine cones, the paint colors will stay vivid — and adhere strongly. Choose a primer that is sprayed on rather than brushed on, as it is easier to get into the grooves and crevices. Sit the pine cone in its toilet paper tube holder with the bottom of the pine cone down. Then spray it with the primer until the top portion is white.
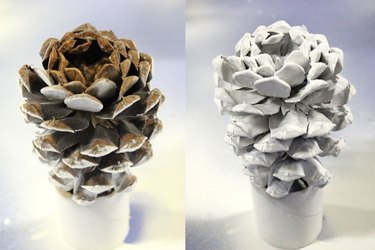
Step 4: Prime on the Other Side
When the primer has dried, about an hour depending on the temperature and humidity, flip the pine cone over to reveal the bottom side. Spray this side with primer so the entire pine cone is completely covered.
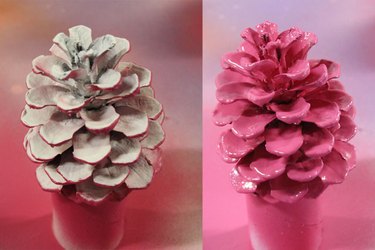
Step 5: Paint the Bottom
When the primer has dried on this side, leave the pine cone in this position, and spray paint the bottom in the color of your choice. Work around the pine cone so the color gets in the crevices from all directions. Keep the nozzle of the spray can around eight inches from the pine cone, and keep the can upright as much as possible. You'll see that because of the layer of primer, the color shows through beautifully.

Step 6: Paint the Other Side
When the paint is dry, usually within an hour, turn the pine cone over to reveal the top portion of the pine cone, which has very little paint on it. Apply spray paint to this side, again working around the pine cone in all directions until it is completely painted. While it will be dry to the touch in about an hour, leave it alone to cure thoroughly overnight before handling so the finish is hardened and durable.

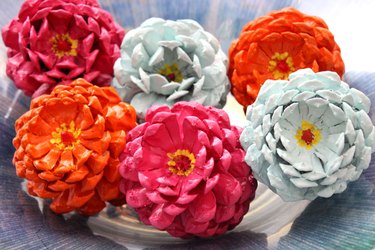
A Bonus Step
Turn the pine cones upside down, and you'll notice that they look like flowers — zinnias to be exact. To complete the zinnia look, use a small brush to dapple yellow paint around the center of the pine cone base, with a spot of red right in the middle.
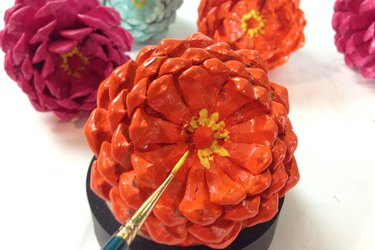
Display the pine cones upside down, and you'll have a bowl of faux zinnias to brighten your day.