You'll find a NEMA L14-20 receptacle on some generators that supply 4 kW or less of electric power. It's a locking receptacle with a notched ground hole, and it accepts only the NEMA L14-20 plug. These are almost identical to the NEMA L14-30 plug/receptacle pair except that the direction of the notch in the ground hole is reversed. The number 20 in the NEMA designation indicates that the NEMA L14-20 plug and receptacle are designed to handle 20 amps of current.
NEMA L14-20 wiring is virtually identical to that for the more common NEMA L14-30 plug/receptacle pair, so you can use an L14-30 wiring diagram if you need assistance. You probably won't need it, though, because both plugs follow standard 240-volt wiring. The only difference between them is that 10-gauge wire is required for the L14-30, whereas 12-gauge wire is acceptable when wiring the L14-20P plug or L14-20R receptacle.
Video of the Day
Video of the Day
Why Would You Need to Install an L14-20P Plug?
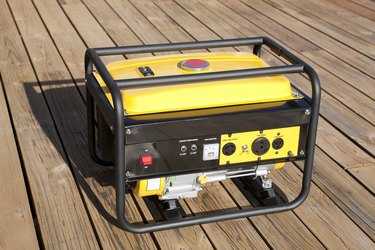
The NEMA L14-20 plug/receptacle pair isn't common. Most 240-volt household appliances draw more than 20 amps and require connectors rated for higher current draw. However, you may have a portable generator that has one of these receptacles but lacks a power cord with the proper plug with which to mate it. In that case, you would install a NEMA L14-20 plug on the power cord. Note that the power cord must contain 12-gauge or larger wires. If the gauge is too small, then the wires can overheat when drawing the rated current from the generator, and a fire could result.
Wiring the L14-20P Plug
The L14-20P plug is rated for outdoor use, so the terminals are encased in a hard rubber housing, and it has a strain-relief clamp on the back. To separate the two halves of the housing, you must first loosen the screws holding this clamp together and separate it. You can then separate the housing by loosening and removing the two screws holding it together.
Feed the power cord through the hole in the rear part of the housing, separate the wires and strip about ½ inch of insulation from the end of each one. You will find four wires in the cord. They are red, black, white and green or bare. The black and red wires are hot and they go on the two brass terminals in the front of the housing. Loosen the terminal screws, wrap the wires clockwise around them and then tighten down the screws. Attach the white wire, which is neutral, to the chrome terminal in the same way, and then attach the bare or green ground wire to the green ground screw.
Once the wires are secure, you can reassemble the plug housing and tighten the screws to hold it together. Don't forget to tighten the strain-relief clamp after reassembling the housing. The clamp keeps the wires from pulling off the terminal screws and prevents shorts and fires.
Use Fork or Ring Lugs for 10-Gauge Wire
Although it's permissible to use 12-gauge wire for NEMA L14-20 wiring, it's safer to use 10-gauge wire. The thicker wire also reduces the chances of equipment underperformance due to voltage drop. It's challenging to wrap 10-gauge wire around the plug terminals, so to avoid loose connections, it's a good idea to crimp a fork or ring lug onto the end of each wire before you connect the wire to the terminal. Crimping lugs onto 12-gauge wires usually isn't necessary, but there's no disadvantage to doing it.