If you want to spruce up your garden or patio, laying tile outside is a great way to do it. But if you're starting from an unkempt garden, you may need to do some prep work to ensure your tiles adhere properly and look as professional as possible. The benefits of laying tile on dirt are that it's less messy and easier to maneuver and take apart than permanent materials, like cement. Laying tile outside can be a little bit tricky, but with the right technique, it can be done at home.
Laying Tile Outside
Video of the Day
When laying tile, you first need to ensure a solid "bed." This is where the tile sits and sticks to. Dirt can make for a perfect bed for outdoor tiles, and, best of all, it's very affordable. Laying tile on sand is easier than laying tiles on gravel, as it's a finer type of dirt. Therefore, clearing a pathway of gravel or rocks and starting with a layer of fine dirt like sand can make the process far easier.
Video of the Day
Prep Your Surface
First, you want to clear the area as much as possible. Use a brush to remove any gravel and take out any large or obtrusive rocks by hand. Once the surface is as clear and uniform as it needs to be, spread a layer of sand over the area you want to be tiled. You want it to be around 1/2 inch thick for maximum grip. You should also dampen your sand using a light spray to make it more malleable. Flatten your sand layer using a hand tamper, then use a bladed screed to ensure the level is totally even. If it ever dips below 1/2 inch of thickness, add more sand and dampen.
Laying Tile on Sand
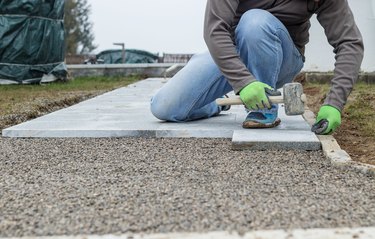
Place your first tile and stamp into place. According to Home Depot, using a rubber mallet will apply enough pressure to secure the tile without the risk of damaging its surface. Once you're happy with your placement, you can repeat the process with all of your tiles until the whole area is filled. Remember to secure each tile in place with your rubber mallet.
Finishing Your Outdoor Tiles
Once your tiles are in place, you need to fill in the areas between them to ensure your surface is as smooth and secure as it can be. Spread loose sand over the tops of your tiles and work it down into the gaps between them. Once these gaps are filled, use a brush to remove any excess sand.
Test Your Surface
Use your garden hose to spray some water over your tiles. After dampening the area, check between your tiles to see if any sand has come away and left gaps. Any gaps could mean a tile coming loose down the line. Take some more dampened sand and work it into any gaps, ensuring they are packed full and secure. Allow this extra sand to dry completely and you'll have a beautifully tiled outdoor area that's as stunning as it is safe.