Things You'll Need
Toothbrush
Knife
Rattail file
Sandpaper
Drill
16 yards cotton or cotton-polyester fabric
Scissors
Needle
Thread
T-pins (optional)
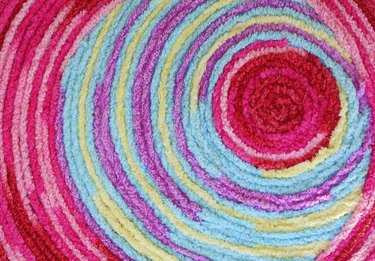
Toothbrush rugs get their name from the tool used to make them. These traditional rugs are created using a modified toothbrush, fabric strips and a basic blanket stitch. Although these charming oval rugs look complicated, they are really simple once you master the basic pattern.
Creating the Needle
Step 1
Cut the bristles and head off the toothbrush with the knife.
Video of the Day
Step 2
Shape that end of the toothbrush into a point with the knife.
Step 3
Use the file and sandpaper to smooth the cut edges of the needle.
Step 4
Drill a 3/8-inch hole in the opposite end of the toothbrush handle.
Step 5
Smooth the inside of the hole with the file and sandpaper.
Preparing the Fabric
Step 1
Snip one edge of the fabric at 1-inch intervals.
Step 2
Tear the fabric into 1-inch strips.
Step 3
Trim any stray threads along the edges of the strips.
Step 4
Add new strips as you reach the ends by overlapping the end of the one in use with the end of another and hand-stitching them together, as close to the ends as possible. Stitching them all together before you begin the rug makes the working strip unmanageable.
Making the Center
Step 1
Baste the end of three strips together with a needle and thread.
Step 2
Pin the stitched strips to the arm of an upholstered chair or to a pillow with the T-pins. This will hold them in place, freeing your hands for the rest of the steps.
Step 3
Braid the strips until you have a plait about 12 inches long. This will make a 36-inch rug.
Step 4
Cut away two of the strips just below the braid and stitch them to the third to secure the braiding.
Weaving the Rug
Step 1
Thread the remaining strip through the hole in the needle, leaving a 5-inch tail.
Step 2
Bring the pointed end of the toothbrush needle up through the first loop on the right-hand side of the braid, but don't pull it all the way through.
Step 3
Wrap the end of the fabric strip behind the needle to make a large circle.
Step 4
Use the needle to pull the end of the strip through the circle.
Step 5
Pull the needle and attached strip the rest of the way through the circle and the braid loop, pulling it up snugly but not as tight as a knot.
Step 6
Continue to make this version of the blanket stitch until you reach the end of the braid.
Step 7
Make two stitches in the last loop on the right-hand side of the braid.
Step 8
Turn the rug over.
Step 9
Make two stitches in the first loop on the new right-hand side.
Step 10
Continue making stitches, one per braid loop, to the end of the braid.
Step 11
Make the corner of the rug by again working two stitches in the last braid and turning the rug over and making two stitches in the next loop.
Step 12
Continue the sides of the rug with a single stitch in each of the stitches in the row before.
Step 13
Make two stitches in the last straight-side stitch of the round before. Place a single stitch in the stitches across the short end – from the double stitching on the first round – and then make two stitches in the first stitch on the other straight side. As your rug gets wider, there will be more stitches across the short end. Continue to make a single stitch in each one, with two stitches for each corner.
Tip
A crochet hook works as a substitute for the toothbrush needle.
Be sure that all of the fabric is colorfast. If it is new, prewash it to remove excess dyes.
Stretchy fabrics, like knits, are difficult to work with for these rugs.
Video of the Day