Things You'll Need
Shovel
Cylindrical concrete forms
Concrete
4-by-4 post base connectors and hardware
4-by-4 lumber
2-by-4 lumber
2-by-10 lumber
1/2 inch, 10-inch-long bolts with washers and nuts
Carpenter's pencil
Roof trusses (custom)
Hammer
Galvanized nails
5/8 inch plywood sheathing
Roofing felt
Roofing shingles
Roofing tacks
Drip edge
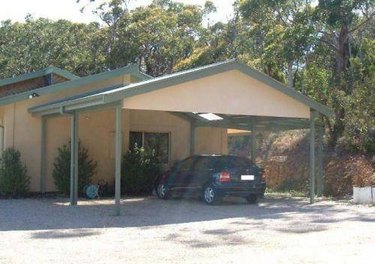
A carport will add shade and protection from the weather for your valuable vehicles. A carport is at first glance a large and difficult project, but the skills required are basic, and don't involve more than average do it yourself carpentry ability. WIth a little work, you can construct your own carport with a gable roof to allow for rain runoff and support of heavy snow loads.
Step 1
Lay out the area that your carport will cover on the ground. Make sure the corners are square. Mark locations for the support posts. They should be located at each corner of the area as well as every 10 feet along the sides, with the exception of the entry side.
Video of the Day
Step 2
Dig holes at these locations at least 18 inches in depth, or further if necessary, to get below the frost line in your area.
Step 3
Sink cylindrical concrete forms in the holes and fill with concrete. Set and align post base connectors in the concrete and allow the concrete to cure.
Step 4
Set the 4-by-4 posts in the post base connectors, plumb the posts, and attach to the connectors with the included hardware. Brace the posts with 2-by-4 lumber.
Step 5
Measure and cut double beams to length from 2-by-10 lumber for each side of the carport. Mark locations on the beams and posts for matching holes that will have 1/2-inch bolts inserted in them to support the beams.
Step 6
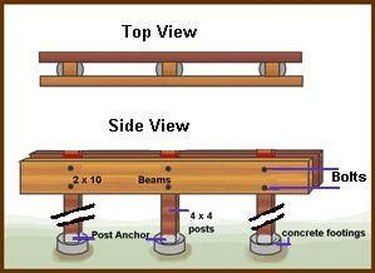
Get plenty of help. Raise each set of beams on either side of the posts and fasten securely with 1/2 inch, 10-inch-long bolts, washers, and nuts as shown in the diagram.
Step 7
Measure from one end of the beams and mark the tops of the beams with a carpenter's pencil every 24 inches. These will be the locations for the roof trusses.
Step 8
Raise the end roof truss in place on top of the beams and flush with the edges of the end. Nail the truss to the beams. Continue this process with the other trusses one at a time, placing them on the marks on top of the beams every 24 inches on center, and nailing. Brace the trusses in place with 2-by-4 lumber temporarily nailed across them.
Step 9
Deck the roof of the carport by nailing 5/8 inch plywood sheathing to the trusses. Cover the decking with roofing felt and attach with roofing tacks. Shingle the roof, attach drip edge, and your carport is finished.
Tip
Trusses of the size for a carport should be engineered for safety. Pre-order engineered trusses from professionals at least 2-3 weeks in advance of building day.
Video of the Day