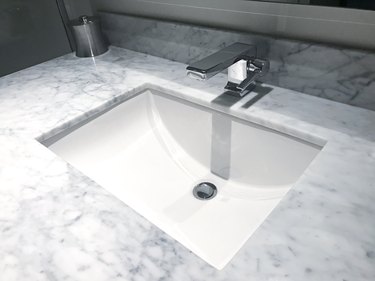
When installing an undermount sink to a marble countertop, a plumber uses clips epoxied to the underside of the countertop and frequently fortifies these with construction adhesive or epoxy applied to the rim of the sink. If a high-strength epoxy is used, such as PC-7 as recommended by Tim Carter of Ask the Builder, the sink is pretty much guaranteed not to fall, but it's also very difficult to remove if you want to replace it. You'll have to do a fair amount of chipping and drilling, and even then, you may end up having to break the sink to remove it, as illustrated on YouTube by JMarin Plumbing on the Daily.
Start by Unhooking the Drain
Video of the Day
An undermount sink doesn't have faucet holes, and the faucet is mounted on the countertop or the wall, so there's no need to disconnect it to remove the sink. You do have to remove the pop-up assembly (if there is one) and the drain, because you'll need to support the sink to prevent it from crashing to the floor.
Video of the Day
To disconnect the pop-up assembly, slide the squeeze clamp off the end of the lever rod. That's pretty much all there is to it, although you'll probably want to unscrew the lever rod and remove it from the sink tailpiece, which is the length of pipe that extends vertically down from the drain. Next, unscrew and remove the tailpiece using adjustable joint pliers. Then unscrew the nut holding the drain strainer to the sink and push the strainer upward to release it.
Support Sink and Remove Clips
You can support the sink by putting an inverted 5-gallon bucket underneath it and stacking a few blocks of wood on top, but Boston.com recommends a more efficient way. Place a 2x4 across the sink opening, pass a bar clamp through the sink drain hole and hook it to the bottom of the sink and the 2x4. Don't make it too tight, because the sink has to be able to move a little so you can pry it downward.
When the support system is ready, go under the sink and unscrew any clips holding it to the underside of the countertop. The posts supporting these clips are usually epoxied to the countertop, but you don't have to remove these until after you get the sink out.
Tap and Drill Glue Bond
The sink should be sealed by a bead of silicone caulk, and you can cut through this with a utility knife. Run the knife around the gap between the sink and the countertop on the inside of the sink several times to be sure you cut completely through the silicone. Now you're ready to break the glue bond.
You can weaken the bond by drilling a series of 1/8-inch holes through the gap between the sink and the countertop with a masonry bit. After doing this, use a hammer to tap an old wood chisel into the gap in a few places and pry downward. Once the sink moves, loosen the clamp a little and use a flathead screwdriver to widen the gap. Work your way around the sink perimeter until it's free, then lower the clamp and remove the sink.
This method doesn't always work, and when it doesn't, you might try attacking the outside of the rim by using a an oscillating tool while working on the underside of the countertop (from inside the cabinet). If you don't have an oscillating tool, use a hammer and chisel instead. You shouldn't have to break the sink to get it out, but if it comes to that, wear goggles and gloves and tap lightly with the hammer to avoid sending shards of porcelain flying through the bathroom.
Warning
Broken porcelain is extremely sharp and can break into tiny razor-sharp pieces. Always wear heavy gloves and goggles to protect your hands from cuts and your eyes from flying debris.