Things You'll Need
Measuring tape
Marker
Pipe Cutter
“Silent” check valves
Small file
Couplings
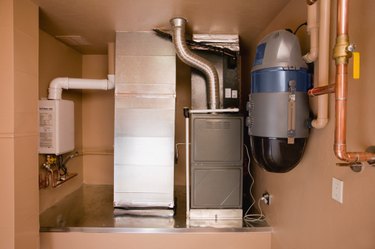
"Hammer" noise is a worrying sign that all is not well within a sump pump system. The noise occurs after the pump stops. Water that is not released externally when the pump stopped starts flowing backwards. The back-flow moves at high speed and pressure, causing the water to violently slam against the check valve. If the valve is old or equipped with a swing lid, it cannot stop the force. The pump and pipe can sustain serious damage if the valve is weak, insufficient in number or non-existent. Every system needs a check valve and, ideally, more than one.
Install More Valves
Step 1
Prepare in advance by measuring the outlet pipe's diameter. Buy the correct sized "silent" check valve and couplings to fit. Put one valve where the outlet pipe leaves the pump. Place another valve about 5 feet above the water line in the sump basin. Thereafter, attach "silent" valves about every 200 feet along the outlet pipe.
Video of the Day
Step 2
Turn the pump off and unplug it.
Step 3
Detach the outlet pipe from the pump.
Step 4
Lift the pump out of the sump basin.
Step 5
Cut out a section of outlet pipe so that it is in two pieces.
Step 6
Place the check valve in between the two pipe pieces. If the gap is too short or narrow, cut or file down one end of the pipe until the valve fits in.
Step 7
Insert one end of the valve into the top end of the pipe. Place the other end of the valve into the lower end of the pipe.
Step 8
Place the couplings around the valve to secure it.
Clean the Valves
Step 1
Turn off the pump and remove the plug from the socket.
Step 2
Remove the clamp and valve.
Step 3
Feel or look inside the valve for signs of mud and grit. If the valve is dirty, hold it under a running tap and wash the debris away.
Step 4
If the valve has a swing lid, change it for a "silent" valve because the washed valve may still cause a noise. Swing lid valves close slowly and often fail to halt the force of water flowing downward. If the valve does not have a swing lid, use it again.
Step 5
Test the system. Switch the pump on again. After a few minutes, turn it off and check if there are any loud noises. If there are, change any remaining original valves to "silent" ones.
Use "Silent" Valves
Step 1
Turn off the pump. Take out the plug.
Step 2
Remove all existing check valves and replace them, one by one, with "silent" valves.
Step 3
Turn the pump back on. After a few minutes, turn it off again and listen for any "hammer" noises.
Tip
The outlet pipe is often very long, from the basement floor up to the exterior. This is why more than one or two check valves are needed.
Swing lid valves take longer to close. This permits more water to rush through and pressure in the outlet to increase, becoming noisy.
Warning
Point the directional arrow on the valve, toward the flow of the water, which is away from the pump.
Before switching the pump on or off, ensure your hands are completely dry.
Wear rubber wellington boots to protect you from electric shocks.
Video of the Day